
A spring bar is one of the smallest parts on a watch, which naturally means it has the power to ruin your afternoon. This tiny metal rod sits between the lugs of your watch and holds the strap or bracelet in place. When it fits correctly, you never think about it. When it does not, your strap rattles, your bracelet refuses to install, or your watch tries to swan dive off your wrist like it has somewhere better to be.
The good news is that learning how to measure a spring bar is simple once you know what you are actually measuring. The confusing part is that people often mix up three related measurements: the watch lug width, the spring bar length, and the spring bar diameter. All three matter. A spring bar that is the wrong length will not seat securely. One that is too thick may not fit through the strap or into the lug holes. One that is too thin may feel loose, especially on heavier watches.
This guide breaks the job into three easy methods: measuring the lug width, measuring an existing spring bar, and measuring the spring bar diameter. You do not need a watchmaker’s bench, a dramatic magnifying visor, or the patience of a Swiss monk. A digital caliper is best, but a millimeter ruler can work for basic sizing. By the end, you will know exactly how to choose the right replacement spring bars for leather straps, rubber straps, NATO straps, metal bracelets, and quick-release watch bands.
What Is a Spring Bar?
A spring bar is a small telescoping metal tube with spring-loaded tips at both ends. Those tips compress inward when you install or remove the watch strap. Once released, they extend into the small holes or recesses inside the watch lugs. That little click you hear when the bar seats properly is the sound of your watch staying attached to your wrist. It is humble, but it is doing important work.
Most traditional watches use spring bars to connect the strap or bracelet to the case. You will find them on leather bands, silicone straps, nylon pass-through straps, mesh bracelets, oyster-style bracelets, and many aftermarket watch straps. Some watches use screws, fixed bars, or proprietary systems, but standard spring bars are still incredibly common.
Why Measuring a Spring Bar Correctly Matters
Spring bars are usually listed in millimeters, such as 18mm, 20mm, 22mm, or 24mm. That number generally corresponds to the lug width of the watch, not the fully extended tip-to-tip length of the spring bar sitting on your desk. This is where many beginners get tripped up. A spring bar labeled 20mm may measure longer than 20mm when it is not compressed because the tips extend outward. When installed, those tips compress into the lug holes.
Choosing the wrong size can cause several problems. If the spring bar is too short, the tips may barely reach the lug holes, making the strap insecure. If it is too long, installation becomes difficult or impossible. If the diameter is wrong, the bar may not pass through the strap channel or may bind inside the lug holes. In the worst case, forcing the wrong bar can scratch the lugs, damage the strap, or make removal much harder later.
In short, measuring is not just fussy watch-collector behavior. It is cheap insurance for your watch, your strap, and your sanity.
Tools You Need to Measure a Spring Bar
You can measure a spring bar with basic tools, but accuracy improves when you use the right ones. Here are the most useful options:
- Digital caliper: The best tool for measuring lug width, spring bar length, and diameter accurately in millimeters.
- Millimeter ruler: Good for measuring lug width if you do not have a caliper.
- Spring bar tool: Helpful for safely removing and reinstalling the spring bar.
- Soft cloth or watch mat: Protects the case and crystal while you work.
- Good lighting: Tiny metal parts love to hide in shadows, carpets, and alternate dimensions.
- Tweezers or a parts tray: Useful for keeping spring bars from rolling away.
If you plan to change straps more than once, buy a decent spring bar tool and a digital caliper. They are inexpensive, and they make the process much less dramatic.
Way 1: Measure the Lug Width of the Watch
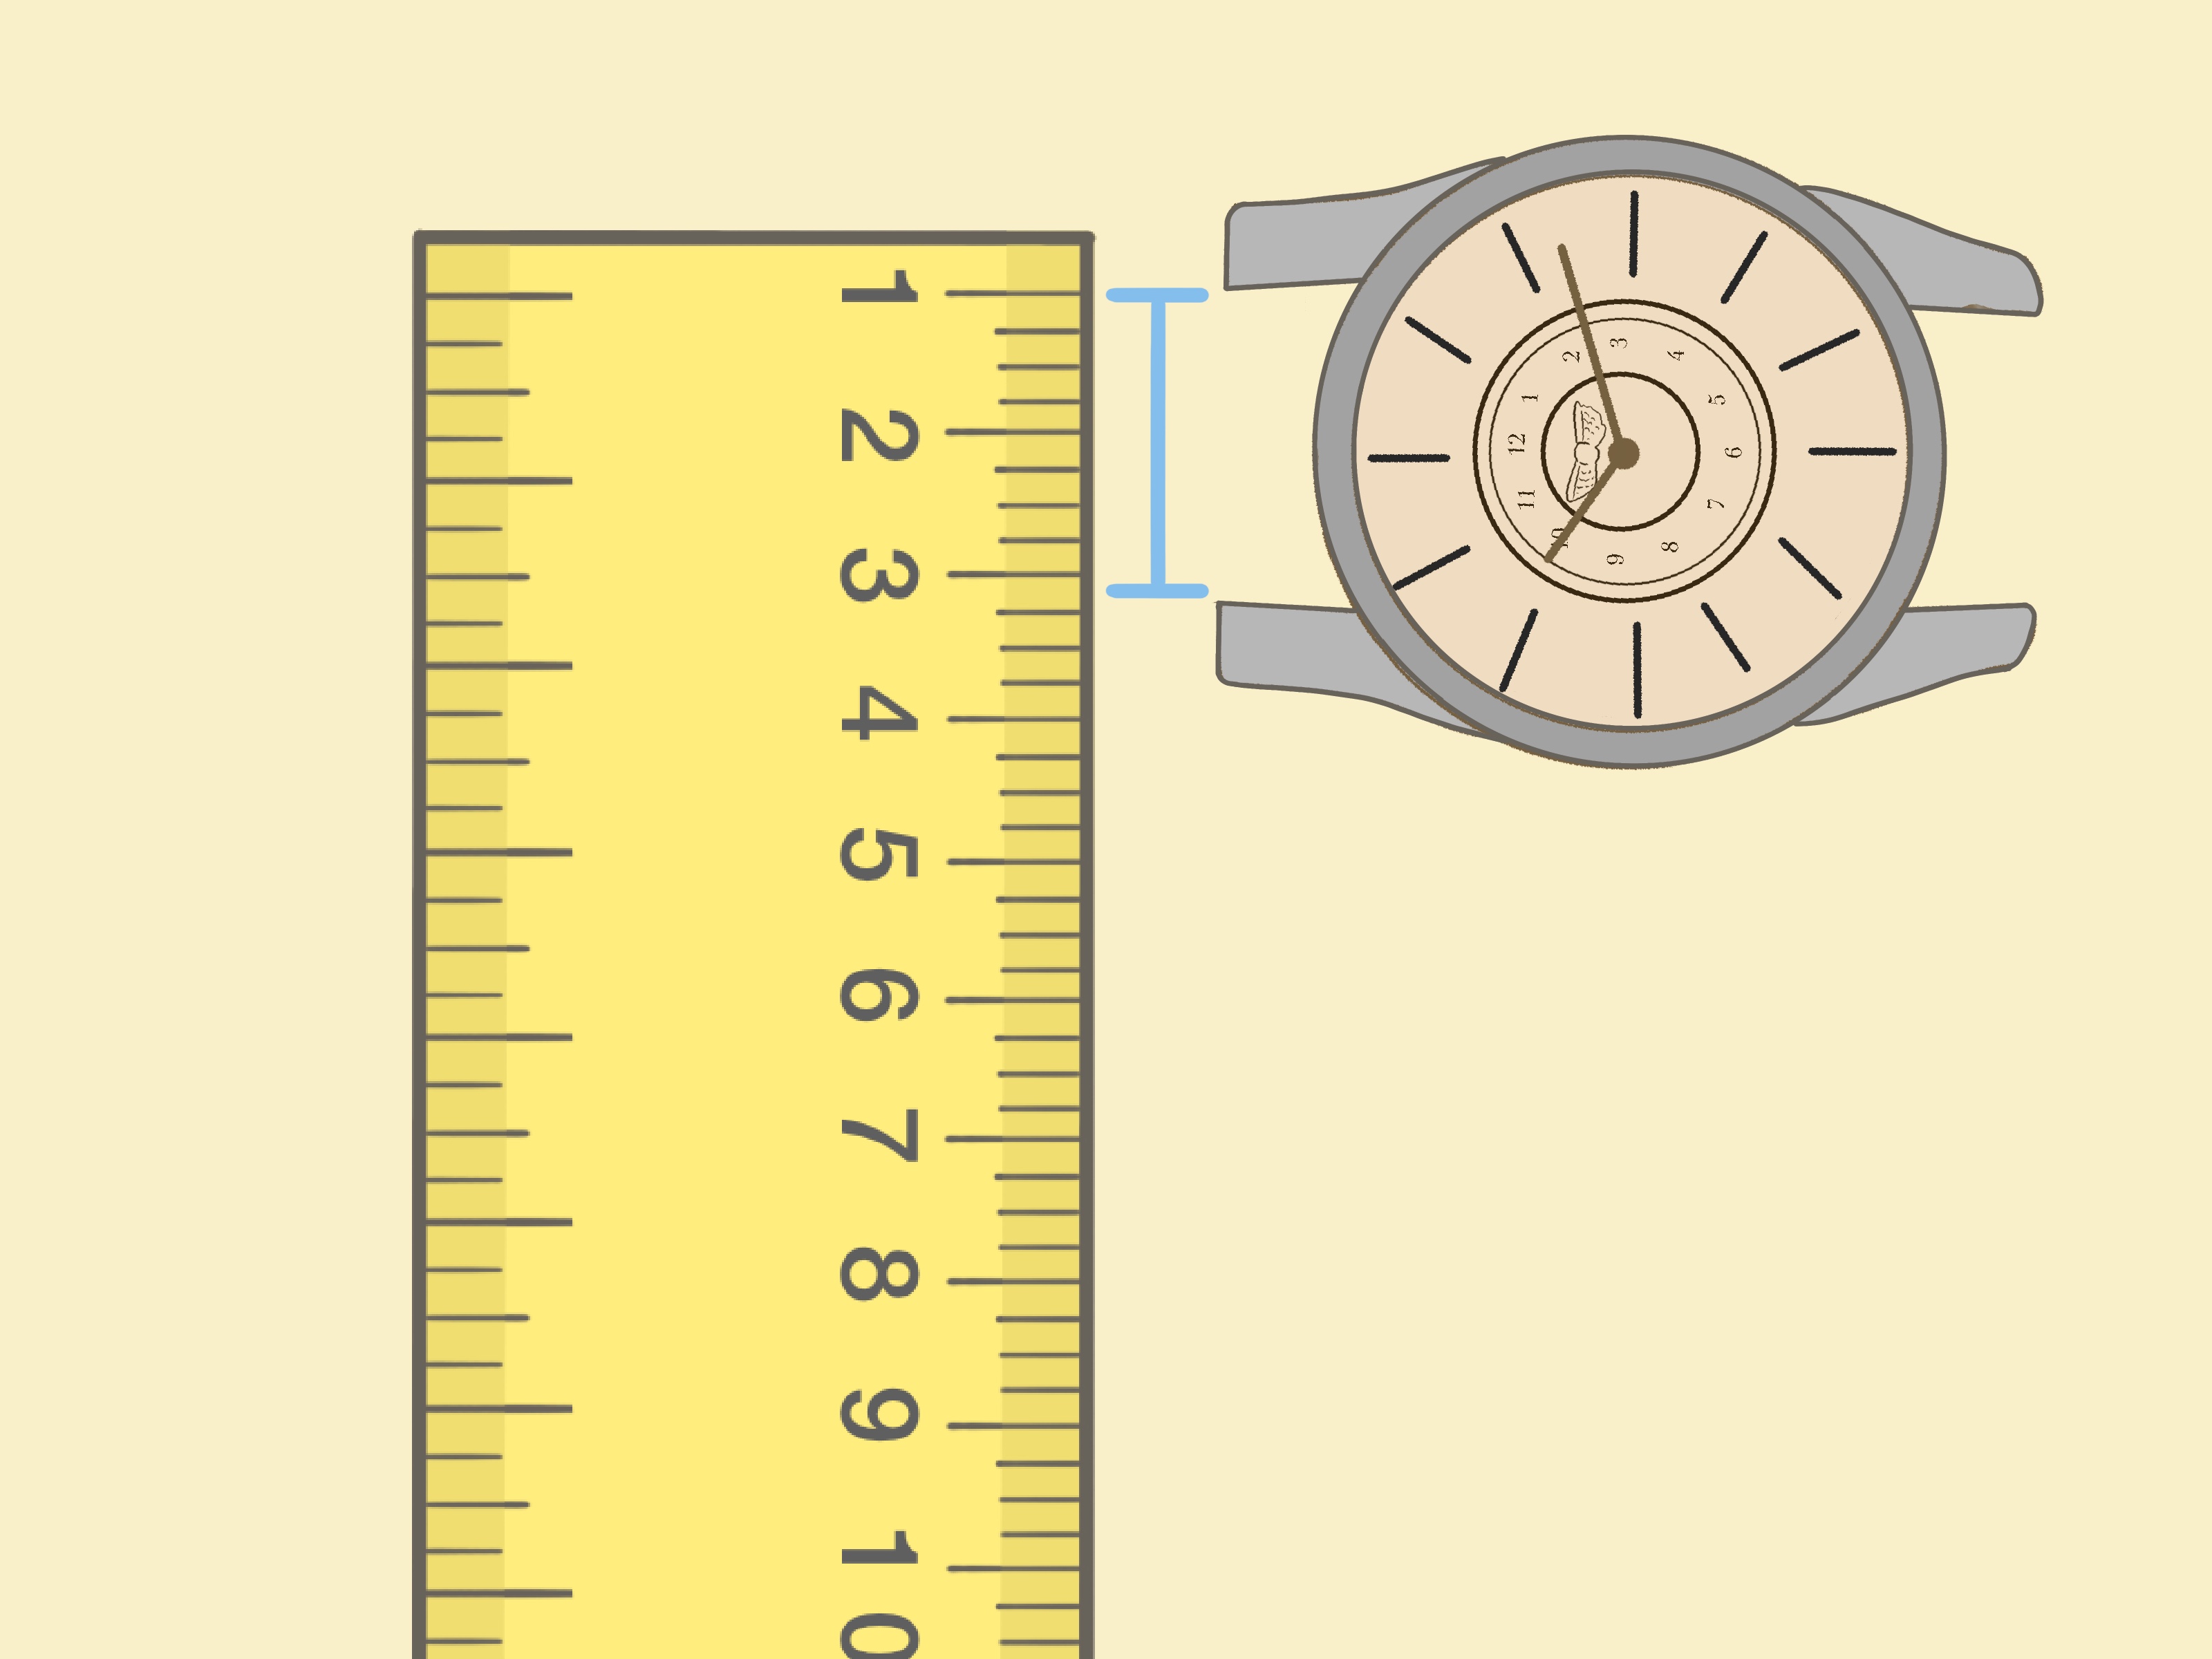
The easiest and most reliable way to find the correct spring bar length is to measure the lug width. Lug width is the inside distance between the two lugs where the strap attaches to the watch case. If your watch has a 20mm lug width, you typically need a 20mm strap and 20mm spring bars.
How to Measure Lug Width with a Caliper
- Place the watch face down or face up on a soft cloth.
- Remove the strap or bracelet if it blocks access to the inside of the lugs.
- Open the caliper jaws slightly wider than the gap between the lugs.
- Place the jaws against the inner walls of the lugs.
- Close the jaws gently until they touch both inside edges.
- Read the measurement in millimeters.
For example, if your caliper reads 20.0mm, you need a 20mm spring bar. If it reads 21.0mm, use 21mm. Do not assume every watch uses an even-numbered size. Many watches use 19mm or 21mm lug widths, especially dress watches, vintage-inspired models, and certain enthusiast-favorite cases.
How to Measure Lug Width with a Ruler
If you do not have a caliper, use a ruler with clear millimeter markings. Hold the zero mark against the inside edge of one lug and read the distance to the inside edge of the opposite lug. Keep the ruler straight across the gap. Do not measure the outside of the lugs, and do not measure the strap width after it has been squeezed, stretched, or worn for years.
A ruler may not be perfect, but it is usually accurate enough for common sizes like 18mm, 20mm, and 22mm. If the result looks like it falls between two sizes, use a caliper or search the watch model’s specifications before ordering parts.
Common Lug Width Sizes
Many watches fall between 16mm and 24mm, with 18mm, 20mm, and 22mm being especially common. Smaller dress watches often use 16mm, 17mm, 18mm, or 19mm lugs. Larger sports watches and dive watches often use 20mm, 21mm, 22mm, or 24mm lugs. Smartwatches and integrated bracelets may follow their own rules, because apparently watch design needed one more plot twist.
Way 2: Measure an Existing Spring Bar
If you already have the original spring bar, measuring it can help you confirm the replacement size. This is especially useful when the watch has unusual lugs, curved spring bars, drilled lugs, shoulderless bars, or a bracelet that seems oddly picky about fit.
Remove the Spring Bar Carefully
Before measuring, remove the strap or bracelet using a spring bar tool. Work over a soft cloth or tray so the spring bar does not launch itself into the unknown. If your watch has drilled lugs, you can use the pointed end of the tool to push the spring bar tip inward from the outside of the lug. If it has closed lugs, use the forked end between the strap and lug to compress the shoulder of the spring bar.
Never force the tool. If the bar does not move, adjust your angle and try again. Scratches happen fast, especially on polished lugs. A small piece of painter’s tape on the lug surface can offer extra protection if you are nervous.
Measure the Compressed Length
To measure a loose spring bar with a caliper, place it lengthwise between the jaws and gently close the jaws until the tips compress. The goal is to measure the length the spring bar occupies when installed between the lugs. This is close to the listed spring bar size.
For example, a spring bar used on a 20mm watch may look longer than 20mm when fully relaxed. That is normal. The tips extend outward because they are spring-loaded. When you compress the tips, the usable installed length should match the lug width.
Compare It to the Lug Width
Measuring the existing spring bar alone is helpful, but pairing it with lug width is better. If the lug width is 22mm and the old bar compresses to about 22mm, you have your answer. If the numbers do not line up, the old spring bar may not be original, or it may be worn, bent, or incorrect.
Look for signs of wear while you have the bar out. Bent tips, weak spring action, rust, rough movement, or visible dents are all good reasons to replace it. Spring bars are inexpensive. Your watch is not. That is the math department’s official recommendation.
Way 3: Measure the Spring Bar Diameter
Length gets most of the attention, but diameter matters just as much. The diameter is the thickness of the main tube of the spring bar. Common standard sizes include around 1.5mm and 1.8mm, while heavier “fat” spring bars may be around 2.0mm or thicker. Some dive watches and tool watches use thicker bars for extra strength, but not every case or strap can accept them.
How to Measure Spring Bar Thickness
- Remove the spring bar from the strap.
- Open the caliper jaws slightly.
- Place the main barrel of the spring bar between the jaws.
- Close the jaws gently until they touch the sides of the barrel.
- Read the diameter in millimeters.
Measure the center tube, not the tiny tips. Product listings usually describe the diameter of the main barrel. The tip diameter is also important, especially for vintage watches or cases with small lug holes, but it is often not listed in basic spring bar descriptions.
Why Diameter Can Make or Break the Fit
A spring bar that is too thick may not pass through the strap hole or bracelet end link. It may also jam in the lug holes. A spring bar that is too thin can feel weak or sloppy, especially on a heavy steel bracelet. The right diameter should slide through the strap cleanly and allow the tips to seat into the lug holes without force.
For everyday leather, nylon, or rubber straps, standard spring bars are usually fine. For dive watches, heavy bracelets, and rugged sports watches, thicker bars may be appropriate if the case and strap are designed for them. If you feel resistance that seems wrong, stop. Watches reward patience and punish enthusiasm with scratches.
Spring Bar Size Examples
Let’s make the process more practical with a few examples.
Example 1: A 20mm Leather Strap
You measure the inside distance between the lugs and get 20.0mm. The leather strap is marked 20mm. In this case, choose 20mm spring bars. A standard diameter around 1.5mm to 1.8mm will usually work, depending on the strap hole and lug design.
Example 2: A 22mm Dive Watch
Your watch has a 22mm lug width and a thick rubber strap. Because dive watches are often heavier and built for active use, you may want stronger spring bars, such as 1.8mm or 2.0mm, if the lug holes and strap can accept them. Do not upgrade to fat spring bars blindly. Bigger is not better if it does not fit.
Example 3: A 19mm Dress Watch
Your ruler suggests the lugs are “almost 20mm,” but a caliper reads 19.0mm. Use 19mm spring bars and a 19mm strap. Trying to squeeze in a 20mm strap may work with soft leather in some cases, but the spring bar still needs to match the actual lug width.
Quick-Release Spring Bars: What to Measure
Quick-release spring bars have a tiny lever that lets you remove the strap without a tool. They are convenient, especially if you like changing straps to match outfits, weather, coffee moods, or the mysterious emotional needs of watch collectors.
To measure a quick-release spring bar, use the same three checks: lug width, bar length, and diameter. However, you also need to make sure the strap has a slot for the quick-release lever. You cannot simply install a quick-release bar into every ordinary strap unless the strap is designed or modified for it.
When replacing a quick-release bar, match the strap width first. A 20mm quick-release strap generally uses a 20mm quick-release spring bar. Then confirm that the bar thickness fits through the strap and seats properly into the lugs.
Common Mistakes When Measuring Spring Bars
Measuring the Outside of the Lugs
The spring bar fits between the lugs, so measure the inside gap. Measuring from the outside edge of one lug to the outside edge of the other gives you a number that is much too large.
Confusing Strap Width with Buckle Width
Many straps taper. A strap may be 20mm at the lugs and 18mm at the buckle. Spring bars for the watch case match the lug end, not the buckle end.
Ignoring Diameter
Two spring bars can both be 20mm long but have different diameters. If one is too thick for your strap, it will not install cleanly. If one is too thin for a heavy watch, it may not feel secure.
Forcing the Wrong Bar
If you need heroic pressure, something is probably wrong. A proper spring bar should compress and seat with controlled pressure. It should not require a battle speech.
Reusing Damaged Spring Bars
If a spring bar is bent, rusty, sticky, or weak, replace it. These parts are inexpensive and easy to keep in a small organizer. Reusing damaged bars to save a few cents is like putting bald tires on a sports car because they still technically exist.
How to Know the Spring Bar Is Installed Correctly
After installing the strap, gently tug each side near the lugs. You should feel a secure connection with no popping or shifting. Look closely to confirm that both tips are seated in the lug holes. If one side is not fully engaged, the strap may hold for a moment and fail later.
For metal bracelets with fitted end links, check that the end link sits flush against the case and that the spring bar is not partially exposed in an odd way. For NATO or pass-through straps, make sure the bar is fully seated before threading the strap. A NATO can sometimes help prevent total watch loss if a spring bar fails, but that is not an invitation to install bad hardware.
Best Practices for Buying Replacement Spring Bars
Once you know your spring bar size, buy quality replacements in the correct length and diameter. Stainless steel is the most common choice. If your watch has drilled lugs, double-flange or shoulderless spring bars may be relevant depending on the case style. If you change straps often, keep extras in common sizes such as 18mm, 20mm, and 22mm.
For expensive watches, vintage watches, or integrated bracelets, consider buying brand-specific parts or asking a professional watchmaker. Some watches have unusual tip diameters, curved spring bars, or proprietary bracelet systems. A generic spring bar may fit “almost,” which is not the same as fitting securely.
When ordering online, check three details: length, diameter, and style. Product photos can also help you identify whether the bar has shoulders, double flanges, quick-release levers, or straight tips. The more exact you are, the fewer tiny envelopes of wrong parts will arrive in your mailbox.
Real-World Experience: What Measuring Spring Bars Teaches You
The first time you measure a spring bar, it may feel like overkill. After all, how complicated can one tiny pin be? Then you try to install a strap that is one millimeter off, and suddenly you understand why watch people own calipers. That single millimeter can be the difference between a satisfying click and twenty minutes of muttering at your desk.
One common experience is discovering that the old strap is not always a reliable guide. A worn leather strap can shrink, stretch, or deform around the spring bar. If you measure only the old strap, you might think your watch takes 19mm when it actually takes 20mm. The lug width tells the truth. The old strap may be telling a dramatic story.
Another lesson is that bracelets are less forgiving than leather or nylon. A soft leather strap might tolerate a slightly thicker spring bar, but a metal bracelet end link often demands the exact style and thickness. If the bar is too thick, it may not pass through the end link. If the tips are wrong, they may not seat deeply enough in the lug holes. This is why bracelet fitting can feel more technical than swapping a simple two-piece strap.
People also learn quickly that a spring bar tool is worth using correctly. The forked end should catch the shoulder of the bar, not scrape randomly around the lug. Slow pressure works better than force. When the tip compresses, move the strap gently away from the lug. The goal is controlled removal, not launching a microscopic metal rocket across the room.
Good lighting makes a bigger difference than expected. Under dim light, it is easy to think a spring bar is seated when only one tip has clicked into place. Under bright light, you can see whether both ends are aligned and secure. A quick tug test after installation is also a habit worth building. Hold the watch over a soft surface, pull the strap near each lug, and check for movement. If it pops free in your hand, congratulations: you just prevented it from popping free over concrete.
Measuring spring bars also teaches you to respect watch design. A dress watch with slim lugs may need thinner bars. A dive watch may benefit from stronger bars. A vintage watch may have lug holes that do not match modern assumptions. A smartwatch adapter may use a standard-looking bar but require a very specific fit. The more watches you handle, the more you realize that “close enough” is not always close enough.
The best practical habit is to write down your measurements. Keep a small note with the watch model, lug width, preferred spring bar diameter, and strap size. For example: “Field watch: 20mm lugs, 1.8mm bars, 20mm strap.” The next time you order a strap, you will not have to re-measure unless you want to. This tiny record saves time, prevents mistakes, and makes you look suspiciously organized.
In the end, measuring a spring bar is not difficult. It is a small skill that pays off every time you change a strap, replace a bracelet, or rescue a watch from a loose fit. A caliper, a careful hand, and two minutes of attention can keep your watch secure and your lugs scratch-free. Not bad for a part smaller than a toothpick.
Conclusion
Measuring a spring bar comes down to three simple checks: measure the lug width, measure the existing spring bar if you have one, and confirm the spring bar diameter. The lug width gives you the correct length, while the diameter helps ensure the bar fits through the strap and seats properly in the lug holes. A digital caliper is the best tool, but a clear millimeter ruler can help with basic lug measurements.
For most watch owners, the process takes only a few minutes. Remove the strap carefully, measure the inside distance between the lugs, match the spring bar length to that number, and choose a diameter that suits the watch and strap. When in doubt, avoid forcing parts and consider asking a professional watchmaker, especially for vintage watches, luxury watches, or bracelets with fitted end links.
Note: Always measure in millimeters, double-check both sides of the watch, and replace damaged spring bars instead of reusing them. A fresh spring bar is a small investment that helps protect the entire watch.












