
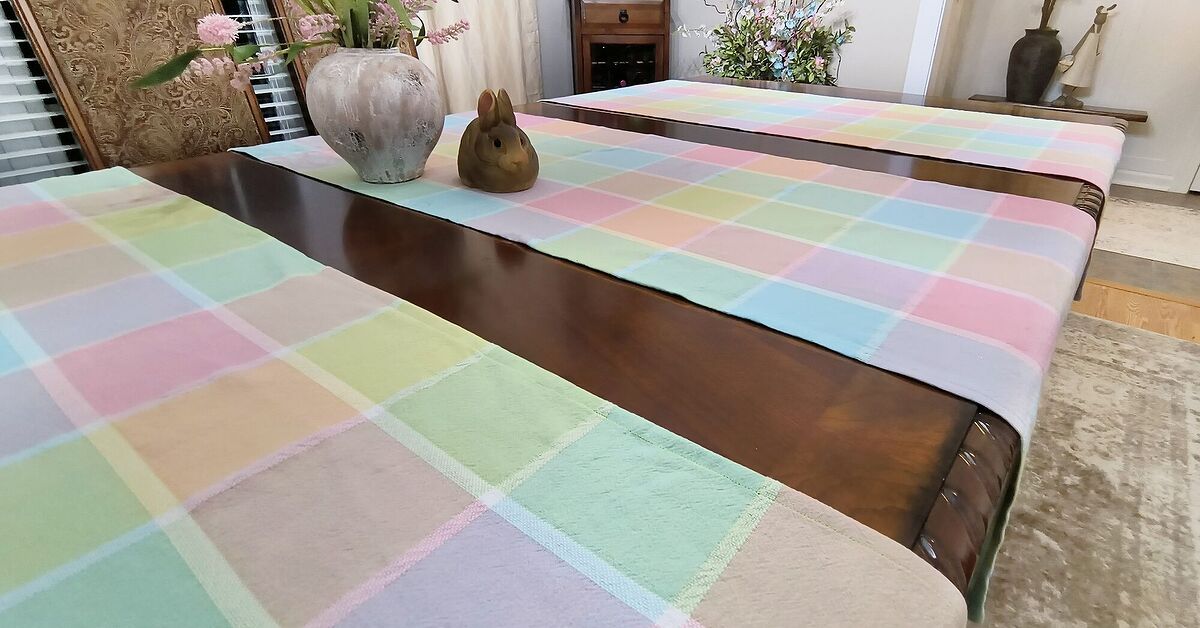
There are two kinds of people in the world: the ones who see an old tablecloth and think, “Laundry,” and the ones who see an old tablecloth and think, “Aha, this is about to become fabulous.” If you’re here, congratulationsyou belong to the second group, which is generally more fun at dinner parties.
Turning one tablecloth into three table runners is one of those gloriously practical DIY ideas that feels smart, stylish, and just a little smug in the best possible way. You save fabric, stretch your décor budget, and end up with three pieces you can use all over the house: one for the dining table, one for the buffet, and one for the console table that has been quietly begging for personality.
Even better, this project works for beginners. You do not need couture-level sewing skills, a dramatic soundtrack, or a sewing machine that costs more than your monthly groceries. You just need a tablecloth with good bones, a tape measure, sharp scissors or a rotary cutter, an iron, and a plan. Once you understand the sizing, cutting, and finishing options, you can turn a single piece of fabric into a trio of table runners that look intentional instead of “I attacked my linen closet with enthusiasm.”
Why Turn One Tablecloth Into Three Table Runners?
The short answer: value. The better answer: flexibility.
A tablecloth uses a lot of fabric, especially once you account for drop on all four sides. A runner, by contrast, needs far less width and can still make a huge visual impact. That means a rectangular tablecloth often contains enough usable yardage to create several runners, particularly if the original cloth is oversized, vintage, or meant for a long dining table.
This kind of upcycling also makes design sense. Three runners are more versatile than one full tablecloth. You can use one runner down the center of a dining table, place a second on a sideboard, and save the third for holidays, outdoor dining, or seasonal swaps. You can also use multiple runners widthwise across the table instead of lengthwise, which creates a layered “placemat for two” effect and makes even a simple table feel thoughtfully styled.
If your tablecloth has a stain, fade line, or worn edge, that is not a deal-breaker. In fact, it is often the perfect excuse to cut around the damage and rescue the best fabric. A small flaw in a large cloth can disappear completely once the cloth is divided into narrower, finished runners.
Start With the Right Tablecloth
Not every tablecloth is a winner, but many are surprisingly well-suited for this project. The best candidates are cotton, linen, cotton-linen blends, polyester blends, or mid-weight washable fabrics that press well and do not shift like they are actively trying to escape your scissors.
Best fabric choices
Cotton: Easy to cut, easy to sew, easy to wash. A classic overachiever.
Linen: Beautiful texture and great drape. It wrinkles like it has opinions, but the look is worth it.
Poly blends: Practical, durable, and usually forgiving for beginners.
Oilcloth or coated fabric: Ideal if you want runners for kids’ tables, outdoor meals, or heavy-use surfaces.
What to avoid
Super slippery satin, very stretchy knits, and heavily embellished tablecloths can be harder to cut evenly and hem neatly. They are not impossible, but they do turn a relaxing afternoon project into a character-building exercise.
Also, wash and dry the tablecloth before cutting if the fabric is washable. Prewashing helps prevent post-project shrinkage and reveals how the cloth behaves in real life. Then press it well. This matters more than people think. Pressing is not optional fussinessit is what separates “homemade” from “handmade.”
Measure Before You Cut Like a Crafting Adult
If you want your finished runners to look polished, measurements come first. Start with the table where the runners will live most of the time. A classic runner should usually extend beyond the tabletop at both ends rather than stopping awkwardly in the middle like it forgot its lines.
A good rule is to aim for a finished runner that is at least 12 inches longer than the table, leaving about 6 inches hanging over each end. Longer is fine for a dramatic look. Shorter can work for a more modern, centered arrangement. Width depends on your table and your style, but narrower runners often feel casual, while wider runners look fuller and more formal.
Now look at your tablecloth. If you are starting with a rectangular cloth, divide the width into three usable panels. For example:
- A 54-inch-wide tablecloth can become three 18-inch panels before hemming.
- A 60-inch-wide tablecloth can become three 20-inch panels before hemming.
- A 72-inch-wide tablecloth can become three generously sized runners or three runners plus extra trim or napkins.
Remember that hemming eats fabric. If you plan a standard double-fold hem, you will lose some width and length. So if you want a finished runner close to 18 inches wide, cut a bit wider to allow for the fold. This is why a 60-inch cloth is especially friendly: three 20-inch strips can finish beautifully after hemming.
A simple example
Let’s say you have a 60 x 120-inch tablecloth. Cut it into three 20 x 120-inch strips. After hemming, each strip may finish around 18 to 19 inches wide and a little shorter in length. That gives you three substantial runners, each suitable for a long dining table, buffet, or entry console.
How to Turn a Tablecloth Into 3 Table Runners
Step 1: Inspect the cloth
Spread the tablecloth on a large flat surface. Check for stains, thin spots, sun fading, embroidery, lace borders, or existing hems you might want to keep. If one edge is already beautifully finished, you may be able to use that edge as part of your new runners and save yourself work. That is called working smarter, not harder, and we support it wholeheartedly.
Step 2: Mark your cuts
Use a ruler, measuring tape, and fabric chalk or washable marker to divide the cloth into three equal strips. Measure in several places, not just once, because fabric has a sneaky habit of shifting when you trust it too much. If you own a rotary cutter and self-healing mat, this is their time to shine.
Step 3: Cut carefully
Cut slowly and keep your lines straight. If the fabric pattern has stripes, checks, or a border print, align your cuts with the design so the finished runners look deliberate. Crooked cuts are the fastest route to muttering at your ironing board later.
Step 4: Decide on your finish
You have three main options: a classic sewn hem, a narrow rolled hem, or a relaxed no-sew/frayed edge finish. The best one depends on the fabric and the look you want.
Three Great Finishing Options
1. Classic double-fold hem
This is the all-purpose winner. Fold each raw edge under about 1/4 inch, press, then fold again and press. Stitch close to the inner fold. This creates a clean, durable edge that works on cotton, linen, and blends. If you want the runners to look store-bought, this is usually the best path.
For extra polish, miter the corners. That simply means folding the corners in a way that reduces bulk and creates a crisp diagonal finish. It sounds fancy, but it is really just geometry wearing good shoes.
2. Narrow rolled hem
If your tablecloth fabric is lightweight, a rolled hem creates a delicate, tidy edge. Some sewing machines can do this with a rolled hem foot, which helps feed the fabric into a very small double fold. This finish is especially nice for airy linen blends or more decorative runners that are meant to feel light rather than chunky.
3. Relaxed no-sew or frayed edge
If you love farmhouse, rustic, or casual holiday styling, a lightly frayed edge can look charming instead of unfinished. Pull a few threads from the cut side to create a soft fringe, especially if the fabric has a stable weave and the selvage ends still look neat. This is ideal for a low-effort makeover and can be especially effective with linen, chambray, or cottons that already have texture.
You can also use fusible hem tape for a no-sew finish if you want cleaner edges without stitching. It is a handy shortcut when the goal is “pretty fast” rather than “heirloom sewing.”
How to Make the Three Runners Look Intentional
The real magic happens after the cutting. Three runners give you decorating options that one tablecloth never could.
Use one down the center
This is the classic layout. Add a low centerpiece, candles, or a line of greenery. Keep centerpieces low enough that guests can see each other without doing awkward neck yoga across the table.
Use all three across the table
This is one of the smartest styling moves. Place the runners widthwise across the table, evenly spaced, so each one serves two opposite place settings. It creates structure, breaks up a long tabletop beautifully, and makes a casual dinner feel surprisingly pulled together.
Split them around the house
One on the dining table. One on the buffet. One on the console or coffee table. Matching textiles in separate zones make a home feel coordinated without screaming “I bought the entire catalog.”
Layer with seasonal décor
These runners also work as a foundation for seasonal styling. Add evergreen branches and pinecones in winter, lemons and herbs in summer, or small gourds and cedar clippings in fall. A simple runner gives the centerpiece a place to live instead of making it look like it crash-landed on bare wood.
Mistakes to Avoid
Cutting before washing
Nothing ruins a victory lap faster than a runner that shrinks into a table scarf after laundering.
Ignoring hem allowance
Three equal cuts do not automatically mean three equal finished runners. Plan for the fold.
Choosing the wrong tablecloth
If the cloth is too narrow, too damaged, or too sheer, forcing it into three runners can leave you with three disappointing strips and one emotionally exhausting afternoon.
Skipping the iron
Wrinkled fabric lies. Press everything: before cutting, before hemming, and after sewing. Your future self will be deeply grateful.
Overdecorating the finished runners
If the fabric has a strong print, let it breathe. You do not need beads, fringe, pom-poms, and a parade float of centerpieces all at once.
Specific Ideas for Different Tablecloth Types
Vintage floral tablecloth
Cut around worn spots, keep the prettiest motifs centered, and finish with a narrow hem. These runners look especially lovely on breakfast tables, garden parties, or spring brunch setups.
Plain white or oatmeal linen cloth
This is the easiest canvas to transform. Add a stitched border, subtle stamped pattern, or soft fringe. It will work year-round and play nicely with nearly every dish set you own.
Plaid or striped cloth
These are great for three-runner conversions because the pattern naturally guides your cuts. Just make sure the stripes stay straight, or your runners may look like they’ve had one too many mimosas.
Stained tablecloth with a good center section
If the stains are near the edges, lucky you. Trim them off, cut the best remaining fabric into three panels, and no one will ever know the cloth nearly met its dramatic end in the donation pile.
Real-World Experience: What This Project Teaches You Fast
The first time most people turn a tablecloth into three table runners, they expect the hard part to be sewing. Usually, it is not. The hard part is deciding where to cut, because that is the moment when the project stops being a “nice idea” and becomes actual irreversible fabric math. Once the first strip is cut, though, the whole thing gets easier. You stop overthinking, the runners begin to take shape, and suddenly the old tablecloth that looked tired in the linen closet starts looking like a small design win.
Another common experience is realizing just how much ironing matters. At the start, a wrinkled tablecloth can look uneven, flimsy, and not worth the trouble. After a proper press, the fabric usually behaves better, cuts straighter, and looks more expensive. That transformation alone convinces a lot of beginners that the iron is not an enemy. It is more like the project manager of the sewing roomunflashy, slightly bossy, and absolutely necessary.
People also discover that table runners are far more forgiving than garments. A shirt has to fit a human body with opinions. A table runner has to lie there and look good. That makes this project ideal for building confidence. If your seam wobbles a little, nobody will inspect it with a magnifying glass over mashed potatoes. If one runner ends up a half-inch narrower than the others, the world continues spinning. In DIY terms, that is excellent news.
There is also something satisfying about getting three finished pieces from one forgotten textile. It feels thrifty without looking cheap. It feels creative without becoming chaotic. And because each runner can be used in a different part of the house, you get a little design echo from room to room. One fabric, three moments, zero need for a dramatic trip to the home décor aisle.
Many people are surprised by how often they use the finished runners. The dining table is obvious, but then one lands on a console table, another ends up under a vase on a buffet, and the third gets pulled out for holidays, brunches, birthdays, or last-minute company. A project that started as “Let’s not waste this tablecloth” becomes “Why did I not do this sooner?”
And perhaps the best experience of all is that the project encourages a new way of seeing old household textiles. A stained linen is no longer just a stained linen. It might be a runner, a set of napkins, a pair of placemats, or trim for another sewing project. Once you turn one tablecloth into three table runners, your closet starts looking less like storage and more like raw material. That is how DIY gets you: first with one humble upcycle, then with the suspicious urge to inspect every old textile in the house like it is hiding a second career.
Conclusion
If you have a tablecloth that no longer earns its keep as a full table covering, turning it into three table runners is one of the smartest ways to give it a second life. The project is budget-friendly, beginner-friendly, and stylish enough to look intentional in both casual and dressed-up spaces. With the right measurements, a careful cut, and a finish that suits your fabric, you can create three useful pieces from one underused cloth.
In other words, this is not just an upcycling project. It is a décor upgrade with excellent manners. Your linen closet gets lighter, your tables get prettier, and your old tablecloth gets the redemption arc it deserves.












