
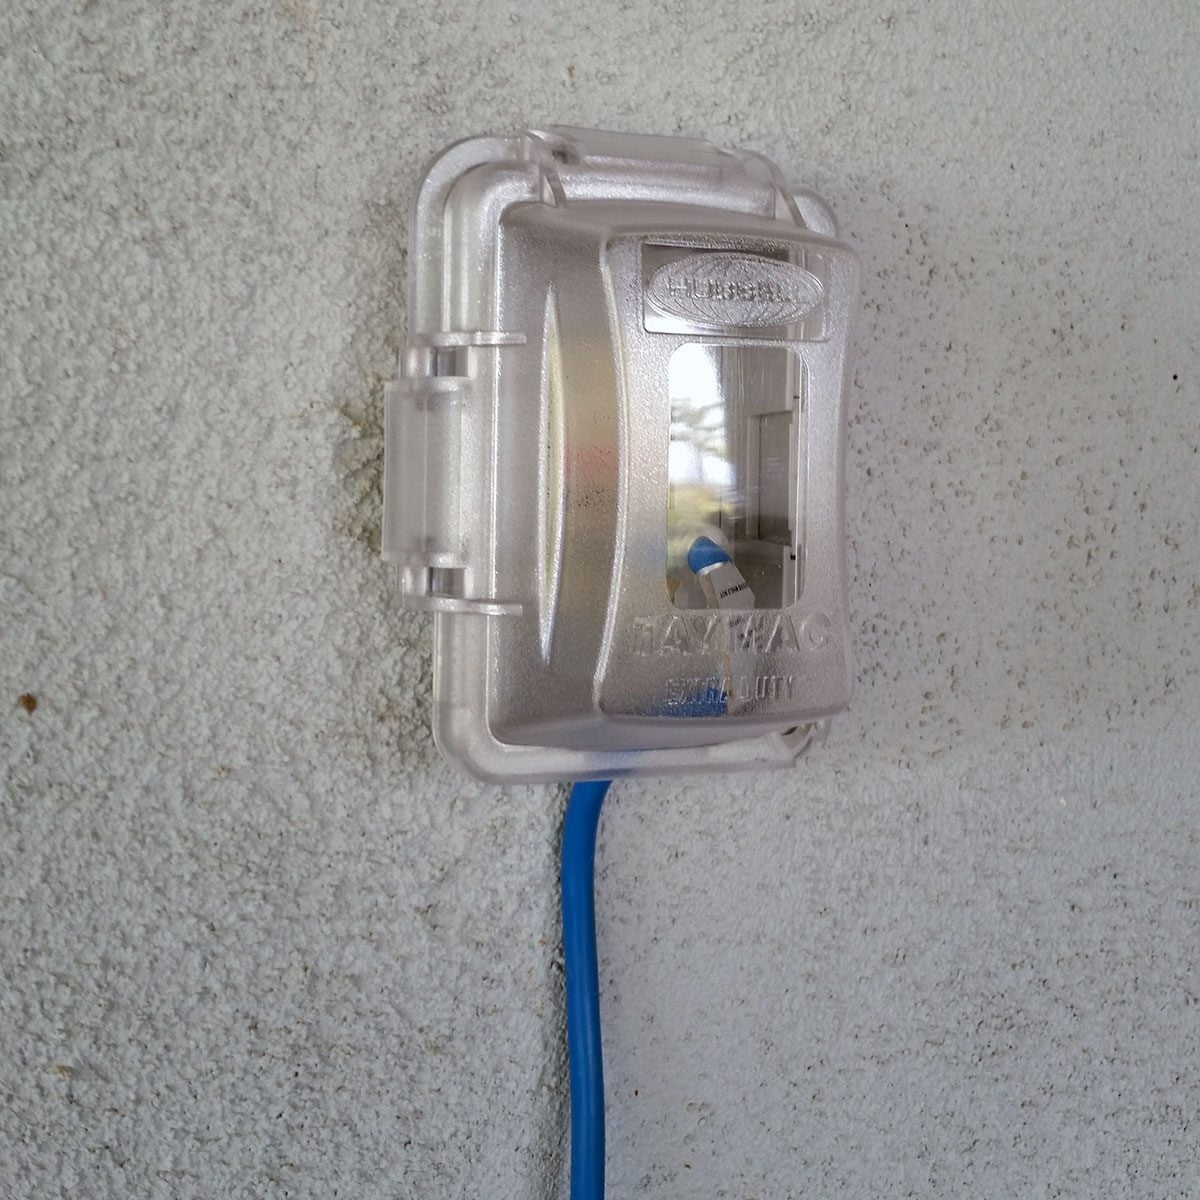
An outdoor outlet has a tough job. It powers string lights, hedge trimmers, pressure washers, holiday decorations, and the occasional extension cord that somehow becomes a permanent resident. Meanwhile, it sits through rain, heat, cold, humidity, insects, and whatever the lawn sprinkler decides to do on Tuesday.
When an exterior GFCI outlet stops resetting, feels loose, shows corrosion, or no longer trips during testing, replacement may be the right fix. The project is manageable for a careful homeowner who understands basic receptacle wiring, but it is not a “close enough” repair. Electricity and moisture are famously bad roommates, so every connection, gasket, rating, and test matters.
This guide explains how to replace an outdoor GFCI outlet safely, how to choose the correct weather-resistant device and cover, how to avoid mixing up LINE and LOAD terminals, and when to hand the screwdriver to a licensed electrician.
What an Outdoor GFCI Outlet Actually Does
A ground-fault circuit interrupter monitors the current traveling through the hot and neutral conductors. If some current takes an unintended pathpossibly through a personthe device detects the imbalance and quickly disconnects power. A typical Class A GFCI is designed to trip at a very small leakage level, generally in the 4-to-6 milliamp range. That is why GFCI protection is used in outdoor and other moisture-prone locations.
A circuit breaker and a GFCI perform different jobs. The breaker primarily protects branch-circuit wiring from overloads and short circuits. The GFCI focuses on ground-fault shock protection. One does not make the other optional where GFCI protection is required.
Why an Ordinary Indoor Receptacle Is Not Enough
Outdoor equipment must tolerate moisture, temperature swings, sunlight, and corrosion. Modern exterior replacements should be listed and marked WR for weather resistance. In locations exposed to rain or water spray, the receptacle also needs a listed weatherproof “while-in-use” cover that remains protective when a cord is plugged in. Many modern installations use an extra-duty cover.
Before You Replace It, Make Sure the Outlet Is Really Bad
A dead outdoor outlet is not always a dead outlet. Before buying parts, check the simple possibilities:
- Press the GFCI’s RESET button firmly.
- Check the electrical panel for a tripped breaker. Move a tripped breaker fully to OFF before switching it back ON.
- Look for another GFCI upstream in a garage, basement, bathroom, or exterior location. One device may protect several downstream receptacles.
- Unplug outdoor equipment, lights, timers, and extension cords, then try resetting again.
- Inspect the cover for trapped moisture, cracked plastic, failed hinges, or a missing gasket.
If the GFCI will not reset, it may have no incoming power, it may be miswired, a downstream fault may still exist, or the device may have reached the end of its useful life. Self-test models may also lock out or show a status indication when protection is no longer available. Replacing the receptacle will not repair damaged cable, a leaking box, or a fault farther down the circuit.
Tools and Materials
- A listed weather-resistant GFCI receptacle marked WR
- A compatible gasket and weatherproof in-use cover, preferably extra-duty where required
- Flathead and Phillips screwdrivers
- A noncontact voltage tester and, ideally, a plug-in GFCI receptacle tester
- Wire strippers and needle-nose pliers
- Electrical tape for identificationnot as a substitute for a proper connection
- A phone or labels for documenting wires
- Safety glasses and dry work gloves appropriate for the task
Choose the Correct Replacement
Match the new device to the branch circuit and local requirements. Never install a 20-amp receptacle on a 15-amp circuit. A 15-amp duplex receptacle may be permitted on some 20-amp branch circuits, but the safest replacement strategy is to verify the circuit rating, conductor size, existing configuration, and applicable code rather than guessing from the face of the old outlet.
Choose a self-testing GFCI from a recognized manufacturer and verify that the device is listed for the application. If children may access the outlet, a tamper-resistant model adds built-in shutters that help block foreign objects. Many outdoor GFCIs combine WR, TR, and self-test features in one device.
How to Replace an Outdoor GFCI Outlet
1. Shut Off Power and Prove It Is Off
Switch off the correct circuit breaker. Put a note or piece of tape on the panel so nobody helpfully turns it back on while you are working. Test the voltage tester on a known live source, check the outdoor receptacle, and then recheck the tester on the known live source. This “live-dead-live” routine confirms that the tester itself did not quietly retire during the project.
Check both receptacle slots, the grounding opening, the box, and any exposed metal cover components. If the tester indicates voltage, stop. The circuit may be mislabeled, supplied by another source, or part of a multiwire branch circuit that requires simultaneous disconnection.
2. Remove the Cover and Pull Out the Old GFCI
Open or remove the weather cover, then take off the faceplate or adapter plate. Remove the receptacle mounting screws and gently pull the device forward without yanking the conductors. Outdoor boxes are often cramped, and old insulation can be stiff. This is not the moment to practice aggressive enthusiasm.
3. Photograph and Label Every Conductor
Before disconnecting anything, take clear photos showing which wires connect to the terminals labeled LINE and LOAD. Add tape labels if the arrangement is not obvious. Do not rely only on terminal position because manufacturers can place LINE and LOAD terminals differently. Eaton specifically notes that terminal locations can change between product versions.
4. Inspect the Box, Cable, and Grounding
Loosen the terminal screws and remove the old receptacle. Examine the box for standing water, rust, cracks, insect debris, loose conduit fittings, burned insulation, overheated wires, and corrosion. Copper should not be severely pitted or blackened. The box must be securely mounted and large enough for the device and conductors.
If water is entering through damaged siding, a failed conduit connection, or a cracked box, correct that problem before installing a new GFCI. A shiny new outlet inside a leaky box is just an expensive sponge with buttons.
Also verify the equipment-grounding conductor. A GFCI can provide ground-fault protection on certain ungrounded circuits, but it does not create an equipment ground, and specific labeling rules apply. For an outdoor circuit with no reliable grounding path, aluminum wiring, badly deteriorated insulation, or an unfamiliar wiring method, call an electrician.
5. Identify LINE and LOAD Correctly
LINE is the incoming power from the panel or upstream device. LOAD is optional and sends GFCI-protected power to downstream outlets. If only the GFCI itself needs protection, the LOAD terminals remain covered or unused according to the manufacturer’s instructions.
Never place the incoming supply conductors on LOAD simply because the wires physically reach those screws more easily. Modern GFCIs may refuse to reset when LINE and LOAD are reversed, but you should not depend on lockout features to correct careless wiring. Follow the diagram packaged with the exact model.
6. Connect the Grounding Conductor
Connect the bare copper or green equipment-grounding conductor to the green grounding terminal. If the metal box must also be bonded, use an approved grounding screw or clip and a pigtail as required. Do not wrap a ground wire around a random mounting screw and declare victory.
7. Connect the LINE Conductors
Connect the incoming hot conductorcommonly blackto the brass-colored LINE terminal. Connect the incoming neutralcommonly whiteto the silver-colored LINE terminal. Use the wire-strip length shown on the device. If the receptacle uses pressure-plate back wiring, insert the conductor as directed and tighten the screw to the manufacturer’s specified torque. Do not use a connection method the device is not listed to accept.
8. Connect LOAD Conductors Only When Needed
If the old GFCI protected downstream outlets and you have positively identified the outgoing cable, connect its hot and neutral to the corresponding LOAD terminals. Keep each circuit’s hot and neutral paired. Mixing neutrals from different circuits can create immediate tripping and potentially hazardous conditions.
When there are several cables, shared neutrals, splices you cannot identify, or more conductors than expected, stop and bring in a licensed electrician. Guessing at mystery wiring is not troubleshooting; it is auditioning for a very bad afternoon.
9. Fold the Wires and Mount the Receptacle
Gently accordion-fold the conductors into the box, keeping grounding conductors away from exposed hot terminals. Position the GFCI with the orientation allowed by the manufacturer, secure it with the mounting screws, and make sure it sits straight without forcing the device against the box.
A GFCI is bulkier than a standard receptacle. If it will not fit comfortably, do not crush wires behind it. The box may need a listed extension or replacement. Family Handyman’s exterior-box guidance highlights that buried, undersized, or damaged boxes sometimes need correction before the new device can be mounted properly.
10. Install the Gasket and Weatherproof Cover
Fit the gasket and cover exactly as the cover manufacturer instructs. The assembly should sit flat, close fully, and remain weatherproof with the intended cord plugged in. Use the correct insert or adapter for a GFCI shape. Make sure cord openings face or drain as designed and that the lid is not held open by a bulky plug.
Do not assume a flip lid that is weatherproof only when closed is adequate for an outlet routinely used in the rain. An in-use cover protects the connection while the cord remains plugged in. Outdoor safety guidance from ESFI, NFPA, Leviton, Hubbell, and This Old House consistently emphasizes GFCI protection plus a suitable weatherproof cover.
11. Restore Power and Test the Installation
Turn the breaker back on. Press RESET; the receptacle should energize. Plug in a lamp or receptacle tester, then press TEST. Power should shut off. Press RESET again to restore it. If LOAD terminals were used, verify that the intended downstream outlets also lose power during the test.
Use a plug-in tester to check for common wiring errors, but remember that a simple tester cannot diagnose every defect. Test the GFCI after installation and monthly thereafter. If the TEST button does not remove power, the RESET button will not latch, or the status indicator shows a fault, turn the circuit off and correct the problem or call an electrician.
Common Problems After Replacement
The New GFCI Will Not Reset
Confirm that the breaker is on and incoming power is actually present. Recheck LINE and LOAD placement. Disconnect outdoor equipment and, with power off, inspect for loose conductors or a downstream fault. Some modern GFCIs intentionally refuse to reset when miswired or when protection has failed.
It Resets but Trips Immediately
A connected appliance, wet extension cord, damaged downstream receptacle, shared neutral, or moisture in the box may be causing a real ground fault. Unplug everything first. If it still trips, leave the circuit off until the fault is found.
The Outlet Works, but Downstream Outlets Are Dead
The LOAD conductors may be disconnected, misidentified, or poorly terminated. Another possibility is that those outlets were never supplied by this GFCI. Use the original photos and circuit documentation rather than experimenting with live wires.
It Trips After Rain
Look for a cracked cover, flattened gasket, open cord port, damaged plug, wet landscaping equipment, or water entering behind the box. Repeated rain-related tripping is evidence of a moisture problem, not a personality quirk in the outlet.
When You Should Call a Licensed Electrician
Stop the DIY repair and call a professional when:
- The box or cable is wet, burned, melted, cracked, or badly corroded.
- You find aluminum branch-circuit wiring or unfamiliar conductors.
- There is no dependable equipment-grounding path.
- Multiple circuits or a shared neutral enter the box.
- The breaker trips after the receptacle is disconnected.
- The outlet is near a pool, spa, fountain, dock, or other specially regulated location.
- You cannot positively identify LINE and LOAD.
- The replacement requires a new circuit, box relocation, conduit repair, or panel work.
Hiring an electrician is not admitting defeat. It is recognizing that electricity does not award bonus points for confidence.
Outdoor GFCI Maintenance That Prevents Repeat Repairs
Press the TEST and RESET buttons monthly, as recommended by electrical-safety organizations. Inspect the cover at the start of each wet or stormy season. Replace broken hinges, brittle gaskets, cloudy or cracked covers, and devices that feel loose or will not hold a plug securely. Keep sprinklers aimed away from the outlet and use extension cords listed for outdoor use.
After storms or freezing weather, check for water inside the cover before plugging anything in. Never defeat a cover because a transformer-style plug will not fit; install a deeper compatible in-use cover instead. A weather-resistant receptacle is built to survive outdoor conditions better, but it is not a submarine.
Real-World Lessons From Outdoor GFCI Replacements
The most useful lessons from exterior outlet work are often discovered after the “easy” five-minute repair becomes a small investigation. The following composite examples reflect common conditions homeowners and electricians encounter.
Experience 1: The Outlet Was Fine; the Cover Was the Problem
In one typical patio setup, the GFCI tripped only after wind-driven rain. The device passed its test on dry days, so replacing it alone would have produced the same failure. The real culprit was a shallow flip cover that could not close over a timer plug. Rain collected around the connection, and the GFCI correctly shut the circuit down. A properly sized in-use cover and new gasket solved the recurring trip. The lesson is simple: the GFCI and enclosure operate as a safety system. Replacing one while ignoring the other is like buying new windshield wipers for a car with no windshield.
Experience 2: Photos Prevented a LINE-and-LOAD Puzzle
Another common replacement involved two cables in a cramped box. Both black conductors looked identical, and the old device’s labels were nearly hidden by dirt and paint. A clear phone photo taken before disconnection showed which cable had been on LINE and which had been on LOAD. Without that photo, the installer would have needed more testing and circuit tracing. The practical habit is to photograph first, label second, and disconnect third. Memory is surprisingly unreliable when four wires are pointing in six directions.
Experience 3: A “Bad GFCI” Was Actually a Wet Extension Cord
A homeowner replaced an outlet because it tripped whenever holiday lights were connected. The new device tripped too. Testing each item separately revealed water inside the female end of an outdoor extension cord. The GFCI was doing exactly what it was designed to do. Unplugging all loads before diagnosis prevents unnecessary replacement and helps separate a device problem from an equipment problem.
Experience 4: The Box Needed Attention Before the Outlet
On an older exterior wall, the outlet wobbled and the cover would not seal. Removing the receptacle exposed a box recessed behind thick siding, with a gap that allowed water and insects to enter. Installing a new GFCI in that condition would have left the mounting loose and the gasket unsupported. The correct repair required a listed box extension and a cover that sat flat against the finished surface. Outdoor electrical repairs are often mechanical repairs too: the box must be sound, secure, properly positioned, and compatible with the cover.
Experience 5: The Replacement Would Not Fit
Modern self-test GFCIs can be deeper than the basic receptacles they replace. In a small metal box packed with stiff conductors and splices, the new device could not be seated without force. The wrong response would have been to tighten the screws until everything surrendered. The right response was to reorganize approved splices and, where necessary, increase usable box space with a listed solution. Conductors need room, and terminal screws should not be pressed into grounding wires or the side of a metal box.
Experience 6: Monthly Testing Caught Failure Before Yard-Work Season
A final example shows why maintenance matters. An outdoor GFCI still supplied power but no longer tripped when the TEST button was pressed. Because the failure was found during a routine monthly checknot while someone was using a pressure washer on wet pavementthe device could be replaced under controlled, dry conditions. A working outlet is not automatically a protective outlet. The TEST button is there to verify the safety function, not merely to decorate the faceplate.
Across these experiences, the pattern is consistent: document the existing wiring, diagnose connected equipment, correct moisture entry, respect box capacity, install the right cover, and test the finished work. The best outdoor GFCI replacement is not the fastest one. It is the one you do not have to revisit after the next rainstorm.
Conclusion
Replacing an outdoor GFCI outlet is a focused project with several nonnegotiable details. Shut off and verify power, use a listed weather-resistant GFCI, preserve correct LINE and LOAD connections, confirm grounding, repair any damaged box or moisture path, and finish with a compatible in-use weatherproof cover. Restore power only after the device is secure, then test the outlet and every downstream receptacle it protects.
When the wiring is unfamiliar or the enclosure is wet, burned, corroded, or overcrowded, a licensed electrician is the smartest tool in the box. Done correctly, the replacement provides reliable outdoor power and a critical layer of shock protectionwithout turning your patio project into an unwanted fireworks display.












