
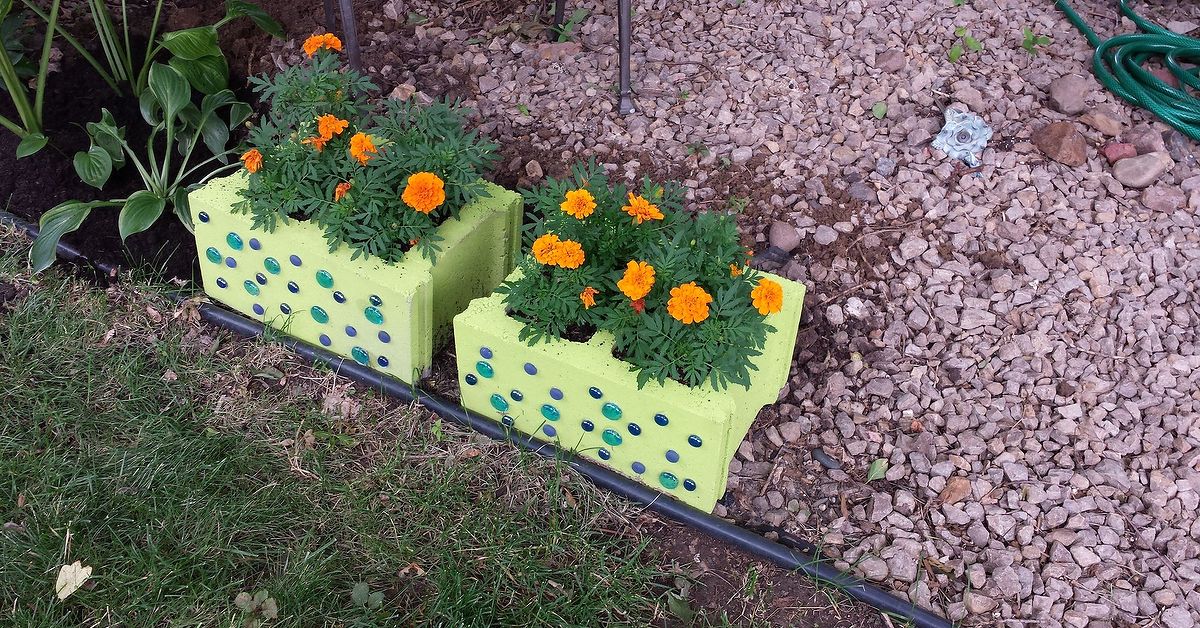
A cinder block planter is proof that garden design does not have to involve a trust fund, a landscape architect, or a weekend spent wrestling with lumber while questioning your life choices. With a few concrete blocks, good soil, and a little imagination, you can build a planter that looks modern, holds up to weather, and gives flowers, herbs, succulents, or vegetables a sturdy place to grow.
Whether you call them cinder blocks, concrete blocks, cement blocks, or “those heavy gray rectangles stacked behind the garage,” these simple building materials are surprisingly useful in the garden. They can become a raised bed, a vertical planter wall, a patio herb station, a privacy border, or a sculptural container garden. Better yet, they are modular, affordable, and easy to rearrange if your first design looks less like “Pinterest patio” and more like “construction site with basil.”
This guide walks through how to plan, build, plant, and maintain a cinder block planter, with practical tips for drainage, soil mix, plant choices, safety, design, and real-world experience. By the end, you may look at a plain concrete block and see not a chunk of masonrybut a tiny apartment complex for plants.
What Is a Cinder Block Planter?
A cinder block planter is a garden container or raised bed made by arranging hollow concrete masonry blocks into a desired shape and filling the openings, interior space, or both with growing medium. The holes in the blocks can be planted individually, while the center area can function as a larger bed for vegetables, flowers, or ornamental plants.
Classic cinder block planters often use standard 8-by-8-by-16-inch blocks. These blocks are easy to stack, widely available at home improvement stores, and heavy enough to stay in place without complicated framing. You can build a simple rectangle, a corner planter, a tiered display, a retaining-wall-style bed, or a vertical planter feature against a fence.
Why Choose a Cinder Block Planter?
The biggest advantage of a cinder block planter is durability. Wood raised beds eventually rot, metal beds may heat up or dent, and plastic containers can crack after years of sun exposure. Concrete blocks are tough. They can handle rain, wind, freeze-thaw cycles in many climates, and the occasional bump from a wheelbarrow operated with too much confidence.
Cinder block planters are also budget-friendly. A few blocks can create a small herb garden, while a larger stack can form a productive raised bed. Because the blocks are modular, you can expand or redesign the planter later. If you move, you can take the blocks apart. Your tomatoes may not appreciate the relocation, but your wallet will.
Main Benefits
- Affordable: Blocks are often cheaper than custom raised bed kits.
- Durable: Concrete resists rot and weather damage.
- Flexible: You can build rectangles, squares, walls, corners, or tiered designs.
- Great for small spaces: The hollow openings work well for herbs, succulents, and annual flowers.
- Low maintenance: No staining, sealing, or replacing boards every few seasons.
- Beginner-friendly: No saw, drill, or advanced carpentry skills required for basic layouts.
Are Cinder Blocks Safe for Planters?
For ornamental plants, cinder block planters are generally a practical and long-lasting option. For edible gardens, many gardeners also use concrete blocks successfully, but it is worth understanding the discussion around safety.
Modern concrete blocks are usually made with cement and aggregates such as sand or small stone. Some blocks may also contain fly ash, a coal-combustion byproduct that can include trace heavy metals. Product labels often do not provide detailed information about the exact aggregates used, so gardeners who are especially cautious may choose to seal the blocks, line the inside wall with heavy plastic or landscape fabric, or reserve block openings for flowers and herbs while growing vegetables in the main bed.
A practical middle-ground approach is simple: buy new blocks from a reputable supplier, avoid old salvaged blocks of unknown origin, do not use crumbling or broken blocks in food gardens, and consider sealing the blocks if you are concerned. For most home gardeners, intact concrete blocks remain a popular raised bed material because they are stable, accessible, and easy to work with.
Best Places to Use a Cinder Block Planter
A cinder block planter can work almost anywhere with enough sunlight, a level base, and access to water. Before you start stacking blocks, spend a few minutes watching how light moves across your space. Most vegetables and flowering annuals need full sun, usually six or more hours of direct sunlight per day. Many herbs also prefer bright light, while leafy greens can tolerate partial shade in hot climates.
Good locations include patios, side yards, front walkways, fence lines, balcony corners with structural support, and backyard garden zones. Avoid low spots where water pools after rain. Concrete blocks are strong, but plant roots still dislike soggy soil. A planter that sits in a puddle is basically a spa day gone wrong.
Materials You Need
A basic cinder block planter does not require fancy supplies. Start with a simple layout and upgrade the design as needed.
Basic Materials
- Concrete or cinder blocks
- Cardboard or landscape fabric for weed suppression
- Quality raised bed soil or a soil-compost blend
- Compost or aged organic matter
- Mulch, such as straw, shredded leaves, or bark
- Plants or seeds
- Work gloves
- Level or straight board
Optional Materials
- Masonry adhesive for permanent stacked designs
- Rebar for taller walls or added stability
- Exterior masonry paint
- Concrete sealer
- Decorative gravel for pathways
- Drip irrigation tubing
How to Build a Simple Cinder Block Planter
You can build a basic cinder block planter in an afternoon. The process is straightforward, but a little preparation makes the difference between a clean, stable garden bed and a wobbly rectangle that looks like it was assembled during an earthquake drill.
Step 1: Choose Your Layout
Decide whether you want a small container-style planter, a raised garden bed, or a vertical accent wall. A simple 4-by-4-foot or 4-by-8-foot raised bed is a popular choice because it provides generous growing space while staying easy to reach from the sides. Avoid making beds wider than about four feet unless you enjoy stepping into the soil and compacting the very thing your plants need to breathe.
Step 2: Prepare the Ground
Clear grass, weeds, rocks, and debris. If you are building on soil, level the area as much as possible. For better weed control, lay down overlapping cardboard before placing the blocks. Cardboard will smother grass and gradually decompose, adding organic matter to the bed. Avoid using plastic across the bottom because it can trap water and interfere with drainage.
Step 3: Place the First Row of Blocks
Set the blocks in your chosen shape with the hollow openings facing up. Use a level or straight board to check that the blocks sit evenly. This first row matters most. If it is uneven, every row above it will exaggerate the problem, like a bad haircut growing out with attitude.
Step 4: Stack Additional Rows if Needed
For a taller raised bed, add a second row of blocks, staggering the seams for stability. One to two blocks high is usually enough for home gardens. If you plan to build higher, use masonry adhesive, rebar, or professional construction guidance to keep the wall secure.
Step 5: Fill With Soil
Fill the main bed with a balanced raised bed mix. A common approach is roughly 70 percent quality topsoil and 30 percent compost. For the individual block openings, use a lighter potting mix blended with compost, especially if you are planting herbs, flowers, or succulents. Avoid filling the whole bed with dense clay soil, which can drain poorly and make roots work harder than a squirrel opening a walnut.
Step 6: Plant and Mulch
Plant according to each plant’s spacing needs. Use the block holes for compact plants such as thyme, oregano, chives, lettuce, marigolds, alyssum, sedum, or small succulents. Use the center bed for tomatoes, peppers, kale, beans, flowers, or mixed vegetables. Add mulch after planting to reduce evaporation, moderate soil temperature, and keep weeds from treating your planter like an open invitation.
Best Plants for Cinder Block Planters
The best plants depend on the size of your planter, sun exposure, and climate. The hollow block openings are small, so choose compact plants with modest root systems. The larger interior bed can support deeper-rooted crops if the soil depth is adequate.
Great Plants for Block Openings
- Thyme
- Oregano
- Chives
- Parsley
- Leaf lettuce
- Radishes
- Marigolds
- Sweet alyssum
- Sedum
- Hens and chicks
Great Plants for the Main Bed
- Tomatoes with cages or stakes
- Peppers
- Basil
- Kale
- Swiss chard
- Bush beans
- Carrots in loose, deep soil
- Zinnias
- Cosmos
- Compact cucumbers with a trellis
Drainage Tips for a Healthy Cinder Block Planter
Drainage is one of the most important parts of container gardening and raised bed success. Concrete blocks are porous, which means they can dry out faster than plastic or glazed ceramic containers. That can be helpful in rainy climates but challenging in hot, dry weather.
Do not add a thick layer of rocks at the bottom of the planter to “improve drainage.” It sounds logical, but it often reduces usable soil depth and can keep water perched closer to the roots. Instead, use a well-draining soil mix, make sure the bed has an open bottom or drainage path, and water deeply when the top inch or two of soil begins to dry.
For the block holes, you can place a small piece of mesh, screen, or landscape fabric at the bottom to keep soil from washing out while still allowing water to escape. This small step saves soil, prevents mess, and keeps your patio from looking like a compost crime scene.
Design Ideas for a Beautiful Cinder Block Planter
Cinder blocks have an industrial look, which can be modern and stylish when used intentionally. If plain gray feels too harsh, you have plenty of ways to soften or personalize the design.
Paint the Blocks
Use exterior masonry paint to add color. White, charcoal, terracotta, sage green, and warm beige can help the planter match your home or patio. For a playful garden, paint each block a different color. For a polished look, keep the palette simple and repeat the same plant varieties throughout.
Create a Vertical Planter Wall
Stack blocks in a staggered pattern with some openings exposed for planting. This works beautifully against a fence or blank wall. Use trailing plants such as creeping Jenny, sedum, nasturtium, or cascading petunias for movement.
Build a Herb Station
Place a cinder block planter near the kitchen door and fill it with basil, thyme, parsley, oregano, and chives. Label each herb with small stakes. This gives you easy access while cooking and prevents the familiar grocery-store tragedy of buying herbs, using six leaves, and watching the rest turn into refrigerator confetti.
Add a Bench or Seating Edge
For a larger project, blocks can form the base of a garden bench with wood planks placed across the top. Keep planting areas separate from seating areas, and make sure any bench structure is stable before use. Plants are forgiving. Gravity is not.
Maintenance Tips
A cinder block planter is low-maintenance, but not no-maintenance. Plants still need water, nutrients, and seasonal care.
- Water regularly: Block openings dry quickly in warm weather.
- Add compost yearly: Raised beds need organic matter replenished.
- Mulch the soil: Mulch helps conserve moisture and reduce weeds.
- Check pH: Concrete can be alkaline, so test soil if acid-loving plants struggle.
- Rotate vegetables: Change plant families each season to reduce pest and disease pressure.
- Inspect blocks: Replace cracked or crumbling blocks, especially in edible gardens.
Common Mistakes to Avoid
Using Soil That Is Too Heavy
Dense garden soil can compact inside planters, reducing oxygen around roots. Mix in compost and use a raised bed blend with good structure.
Making the Bed Too Wide
If you cannot comfortably reach the center, the bed is too wide. Keep the design practical so harvesting does not become a yoga challenge.
Skipping Sunlight Planning
A gorgeous planter in deep shade will not produce sun-loving vegetables. Match your plants to the light you actually have, not the light you wish you had.
Forgetting About Water Access
Place your planter close enough to a hose or watering can route. A thirsty garden at the far end of the yard quickly becomes “survival of the least dramatic.”
Overplanting the Block Holes
Small spaces need small plants. One herb, one lettuce plant, or one compact annual per opening is usually enough.
of Practical Experience With Cinder Block Planters
After working with cinder block planters in real garden settings, the first lesson is simple: layout matters more than enthusiasm. It is very easy to get excited, buy a stack of blocks, and start arranging them like oversized garden LEGOs. But a planter that looks good in your head may feel awkward once you try to water, weed, and harvest from it. Before filling anything with soil, walk around the shape. Bend, reach, and imagine pulling a tomato from the middle. If you feel like you are auditioning for a circus act, shrink the layout.
The second lesson is that cinder block holes are both useful and slightly demanding. They are fantastic for herbs and small flowers, but they dry out faster than the main bed. In hot weather, basil in a block opening may need water more often than a pepper plant growing in the center. A small drip irrigation line or careful hand-watering solves the problem. Mulching each opening with shredded leaves or straw also helps. Without mulch, the top layer can dry into a crust, especially in full sun.
Another experience worth sharing: paint changes everything. Plain gray blocks can look clean and modern in the right setting, especially with ornamental grasses, succulents, and white flowers. But in a small patio or front yard, unpainted blocks may read as unfinished. A coat of exterior masonry paint instantly makes the planter feel intentional. Soft black creates a sleek modern look. White brightens shady corners. Earth tones blend with brick, mulch, and wood fencing. If you want personality, paint only the outside faces and leave the inside unpainted.
Soil settling is also real. After the first few waterings, the soil level drops. This is normal, not a gardening scandal. Fill the bed slightly higher than the final level, water it in, let it settle, and then top it off with more soil or compost. If you plant immediately after filling and the soil sinks, seedlings can end up sitting too low, where airflow is poor and water collects around stems.
One of the best uses for a cinder block planter is a mixed edible-and-ornamental bed. For example, plant peppers and kale in the center, then fill the block openings with marigolds, thyme, and alyssum. The result looks cheerful, attracts pollinators, and gives the bed a finished edge. It also makes the garden feel less like a vegetable factory and more like a place you actually want to spend time.
Finally, do not underestimate the weight. Move the blocks before you are tired, wear gloves, and place them carefully. Once filled with soil and watered, a cinder block planter is not something you casually scoot three feet to the left because “it might look better over there.” Plan first, lift safely, and your future back will send a thank-you card.
Conclusion
A cinder block planter is one of the most practical DIY garden projects for homeowners, renters with outdoor space, and anyone who wants a tough, affordable, customizable planter. It can be rustic, modern, colorful, compact, or surprisingly elegant. With the right location, a stable layout, well-draining soil, and smart plant choices, those humble concrete blocks can become a productive raised bed, a stylish patio feature, or a charming herb garden just steps from the kitchen.
The key is to treat the project like a real garden structure, not just a pile of blocks with dirt in it. Plan the size, prepare the base, choose safe materials, think about drainage, and match plants to the available sunlight. Do that, and your cinder block planter will reward you with flowers, herbs, vegetables, and the quiet satisfaction of building something useful with your own two hands.











