
Note: This article is formatted for web publication, includes only the HTML body, and intentionally omits source links.
Few machines capture the mood of old-school electronics like a vintage tube tester. It looks part laboratory instrument, part lunchbox, part mechanical puzzle box, and part lie detector for glowing glass. Open one up and you’ll find a tiny world of transformers, sockets, rotary switches, resistors, lamps, rectifiers, and enough cloth-covered wiring to make a modern PCB blush. If radios and amplifiers are the stars of the tube era, the tube tester is the grumpy backstage manager muttering, “Let’s see who’s actually ready to perform.”
A proper vintage tube tester teardown is more than a nostalgia trip. It reveals how service shops, radio owners, and even corner drugstores handled tube problems in the decades before solid-state electronics took over. It also shows why these testers still fascinate restorers today. They are practical, mechanical, deeply clever, and sometimes hilariously optimistic about what a quick bench test can really tell you.
In this guide, we’ll crack open the world of the vintage tube tester, look at what’s inside, explain how the major tester types work, point out the parts that usually fail, and talk honestly about what these machines can and cannot do. Along the way, we’ll keep one foot in technical reality and the other in the charming chaos of mid-century service culture.
Why Tube Testers Became Bench Royalty
Before transistors shoved their way into everything, vacuum tubes were everyday parts. Radios, TVs, hi-fi gear, test equipment, and plenty of specialty devices depended on them. When a set started acting strange, one of the first suspects was often a tube. That created a real market for quick diagnosis, which is exactly where the vintage tube tester earned its keep.
Some testers lived on the technician’s bench. Others were portable units designed for service calls. And the most theatrical versions sat in drugstores or grocery stores, where customers could remove tubes from a radio or TV at home, bring them in, test them, and buy replacements on the spot. That self-service setup explains why many public testers were built for speed and simplicity rather than deep analysis. They had to survive ordinary people, which is one of the harshest engineering environments known to humankind.
That history matters when you perform a teardown. A tester built for a repair shop may be compact, information-dense, and slightly intimidating. A self-service cabinet tester may be large, highly visual, and designed to prevent user mistakes with numbered sockets, clear instructions, and bold meter zones. The internal layout follows the mission.
What a Vintage Tube Tester Usually Looks Like Inside
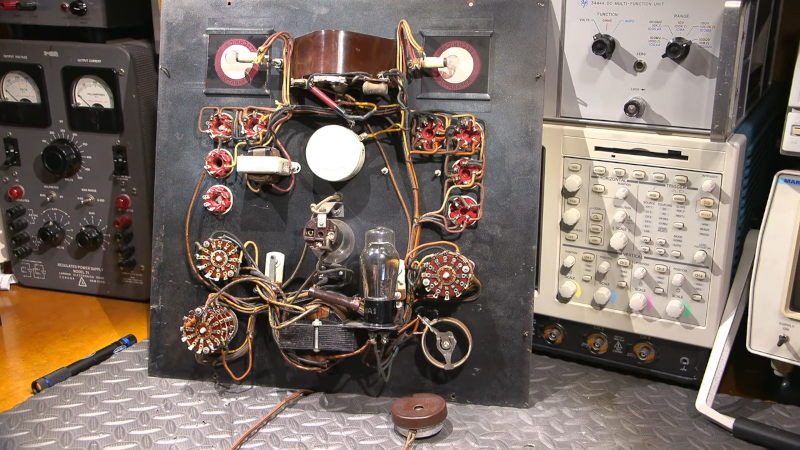
Lift the lid, remove the chassis, and most vintage tube testers start telling the same story. The names on the front panel change, the switch arrangements vary, and the meter graphics may go from elegant to delightfully dramatic, but the internal cast of characters is familiar.
The Power Section
Most testers need a transformer or some other power-handling arrangement to provide heater voltage, plate voltage, bias conditions, and lamp or meter functions. This is usually the heaviest part of the machine and often the part that makes you say, “Ah, so that’s why this suitcase weighs as much as regret.” In a mutual-conductance tester, the power section is especially important because the consistency of voltages directly affects the meaning of the reading.
In many older units, rectification may be handled by a tube rectifier, a selenium rectifier, or later silicon parts if the unit has already been serviced. Selenium rectifiers are notorious suspects in restoration work. If one is still present, it deserves attention, because those parts age poorly and can fail with heat, odor, and voltage problems that no one invites to the party.
The Meter Circuit
The analog meter is the personality center of the tester. It may display simple bad-to-good zones, percent scales, line adjust marks, or true mutual conductance values in micromhos on more sophisticated models. During teardown, meter condition matters enormously. A sticky movement, cracked scale, weak damping, or incorrect shunt resistor can turn a respectable tester into a very confident liar.
Some restorers discover that a “bouncy” or inconsistent tester isn’t haunted at all. It may simply have a tired capacitor across the meter terminals, oxidized switch contacts, drifted resistors, or poor line calibration. Vintage electronics rarely fail in exciting ways when ordinary old age will do.
The Socket Field
The front panel usually carries a forest of sockets: 4-pin, 5-pin, 6-pin, octal, loctal, miniature, compactron, and whatever else the era demanded. Inside, each socket is wired into a switch matrix that lets the tester route tube elements to the desired test conditions. In plain English, the machine is a flexible traffic cop for electrons. The chart tells it where each pin should go, and the switches create that road map.
Dirty sockets are a classic headache. Rusty tube pins, oxidized contacts, and worn leaves can create intermittent readings that make a good tube look bad or a bad tube look merely moody. During teardown, inspection and careful cleaning of sockets is not glamorous, but it is often more important than replacing a dozen random parts just to feel productive.
The Switch Banks and Roll Chart
Many vintage testers are really switch machines disguised as instruments. Rotary selectors, lever banks, pushbuttons, and “English,” “bias,” or “shunt” controls all work together to configure the test. If the tester has a built-in roll chart, that paper guide is effectively the instrument’s operating system. Without it, you have a handsome box that can heat filaments and destroy confidence.
Teardown often reveals that the mechanical parts are just as important as the electrical ones. Hardened grease, sluggish chart rollers, bent linkages, and fractured wafer switches can make a tester unusable even when the electronics are mostly sound. In old test gear, the battle is usually half chemistry and half choreography.
Emission vs. Mutual Conductance: The Big Personality Split
No vintage tube tester teardown is complete without discussing the central divide in tester design: emission versus mutual conductance. This distinction matters because it shapes the circuitry inside, the cost of the instrument, and the meaning of the results.
Emission Testers
An emission tester is usually simpler and faster. It asks a practical question: can this tube produce the needed current under a defined load? That makes it excellent for finding obviously weak or dead tubes in basic service work. Many classic service testers and public testers live in this category. Their internal circuits are often straightforward, and that simplicity is one reason so many have survived.
The catch is that emission readings are not the same thing as a full portrait of in-circuit performance. Two tubes can both land in the “good” range while behaving quite differently in an amplifier or RF stage. For that reason, emission testers are wonderful at identifying obvious failures, but they are not always the last word for matching, fine evaluation, or bragging rights in the audio world.
Mutual-Conductance Testers
A mutual-conductance tester goes further. It applies more carefully defined operating conditions and measures how plate current changes in response to a signal at the control grid. In other words, it is trying to say something more meaningful about the tube’s ability to amplify. That is why these testers are more prized by collectors, restorers, and anyone who enjoys numbers that sound authoritative at swap meets.
Open one up and you generally find more circuitry, more calibration sensitivity, and more reasons for age-related drift to matter. These testers can provide richer information, but they are also less forgiving of worn components, inaccurate line settings, weak internal rectifier tubes, or sloppy measurement technique. A mutual-conductance tester in poor condition is not “better” than a healthy emission tester. It is just a more expensive way to be wrong.
The Most Important Tests Are Not Always the Flashiest
Beginners often fixate on the quality reading, the big needle swing, or the satisfying moment when the meter marches into the good zone. Vintage teardown veterans know better. The most important protection tests are often the quiet ones.
Filament Continuity
Before anything else, the tester needs to confirm that the heater or filament is intact. No filament means no normal tube operation. In some testers, that is obvious from current draw or a visible glow. In others, it is part of the initial procedure and easy to overlook if you are treating the machine like a fortune teller instead of a tool.
Shorts and Leakage
Shorts testing is arguably the most important function in the entire instrument. A shorted tube can misbehave in the circuit, stress transformers, distort readings, and in some cases damage the tester itself. Many vintage machines use a lamp-based system, often with a neon bulb, to indicate shorts or leakage. During teardown, these indicator lamps, their series resistors, and their sensitivity settings deserve real attention.
Leakage is the sneaky cousin of a dead short. It may not look dramatic, but it can still cause noise, instability, odd bias behavior, or false confidence if the operator skips the test and jumps straight to emission or Gm. In restoration work, a shorts or leakage circuit that is out of calibration can ruin the usefulness of the entire machine, even if the main meter still seems lively.
Line Adjust
The line adjust control is the tester’s version of clearing its throat before speaking. It sets operating conditions correctly so the readings mean what the designer intended. On many testers, line adjustment must be checked before and after inserting the tube because heater current changes the load on the transformer. Ignore this and your tester may still produce a reading, but it will be the electrical equivalent of measuring your height while standing in a hammock.
Common Failures You Find During a Teardown
Most vintage tube tester teardowns uncover the same troublemakers, and none of them are especially exotic.
Paper and Electrolytic Capacitors
Old capacitors are among the first components to suspect in vintage test gear. Electrolytics dry out, paper caps become leaky, and both can upset calibration, meter behavior, leakage circuits, and power supply performance. In many cases, replacing bad capacitors restores stability faster than any amount of front-panel optimism.
Selenium Rectifiers
If you find a selenium rectifier, pay attention. Some restorers preserve them for originality, but many replace them with modern silicon diodes because reliability matters more than vintage aroma. If a selenium part has overheated or broken down, it can drag voltages off target and make the tester appear mysteriously weak, inaccurate, or unstable.
Dirty Switches and Sockets
Oxidation is the universal house pet of vintage equipment. It lives in switch contacts, socket leaves, selector wafers, pushbuttons, and chart contacts. Because tube testers route so many different element connections through mechanical selectors, even minor contact problems can have major consequences. A single bad switch position can create one false setup among hundreds of correct ones, which is exactly the kind of nonsense that steals an afternoon.
Drifted Resistors
Carbon composition resistors often wander upward in value with age. In a tube tester, that can affect meter shunts, bias networks, shorts sensitivity, and calibration references. A machine may still “work” in the sense that lights come on and the meter moves, but the numbers can become increasingly fictional.
Mechanical Wear
Broken wafer switches, loose knobs, cracked meter covers, bent chart rollers, frayed cords, and tired hinges are routine finds. Vintage tube testers are both electrical and mechanical objects, and a teardown should respect both halves. It is hard to trust a precision reading from a machine that feels like it was repaired by a raccoon with a screwdriver.
How to Teardown a Vintage Tube Tester Without Making It Worse
Start with documentation if you can find it. Manual pages, tube charts, and calibration notes are gold. Photograph everything before removal. Label wires if you have to detach anything. Check whether the tester is isolated from the mains before poking around. And do not assume that because the instrument is old, the voltages inside are automatically polite.
Once opened, inspect for obvious damage: burned resistors, cracked wafers, leaking caps, broken lamps, missing hardware, improvised repairs, and signs of overheating around rectifiers or power resistors. Then clean carefully. Dust, dirt, and nicotine sludge can hide faults and create leakage paths in their own right. After that, move methodically through the power section, meter circuit, switches, sockets, and calibration components.
When replacement parts are necessary, keep the mission of the tester in mind. If the machine is meant to be a trustworthy bench tool, reliability and stable calibration may matter more than perfect historical purity. If it is a collectible showpiece, you may choose gentler intervention. Either way, honesty beats fantasy. A pretty but inaccurate tube tester is decor with a meter.
What a Vintage Tube Tester Can Really Tell You
This is where a lot of romantic ideas go to get calibrated. A vintage tube tester is a service instrument, not a magical oracle. It is very good at identifying dead, shorted, badly leaky, or obviously weak tubes. It can also help compare sections in multi-section tubes, flag questionable parts, and guide troubleshooting. That is incredibly useful.
But it is not the same as operating the tube in every real circuit at every relevant voltage and signal condition. Some tubes that test well can still misbehave in an amplifier. Some tubes that read only fair may work acceptably in less demanding service. And powerful tubes, especially those used in harsh high-voltage environments, may never be evaluated perfectly by a compact service tester.
That is not a flaw in the idea of tube testers. It is simply a reminder to interpret results wisely. The smartest restorers use the tester as one piece of evidence, not the entire courtroom drama.
Experience: What Living With Vintage Tube Testers Actually Feels Like
After you spend enough time around vintage tube testers, the experience becomes oddly personal. You stop seeing them as anonymous instruments and start recognizing their habits, their moods, and their little quirks that never quite appear in the manual. One unit has a line adjust control that feels like a precision instrument made by Swiss watchmakers. Another has a shorts lamp that glows with the dramatic timing of an actor waiting for applause. A third has a roll chart that advances with the enthusiasm of a sleepy turtle on a union break.
The first real lesson is humility. A tester that “kind of works” is usually more dangerous to your judgment than one that is obviously dead. When a dead tester sits on the bench, you know you have a problem. When a half-restored tester produces believable readings, it tempts you to trust it before it has earned that trust. That is how people end up announcing that a weak tube is “strong,” a leaky tube is “fine,” or a matched pair is “close enough” if you squint and maybe hold the meter at a flattering angle.
The second lesson is that cleaning and calibration are not boring side chores. They are the whole game. More than once, a tester that seemed electrically sick turned out to be suffering from grimy switch contacts, poor socket grip, oxidized tube pins, and a line calibration that had drifted into fantasy. Fix those things and suddenly the instrument stops acting like a conspiracy theorist and starts acting like a tool again.
Then there is the emotional side of the teardown. Vintage test gear has a way of preserving the working habits of its earlier owners. You find handwritten chart updates tucked under the lid, replacement parts installed decades ago, careful soldering in one area and reckless improvisation in another. Sometimes you discover a tester that was obviously loved. Other times you open the case and get the strong impression that someone repaired it during a thunderstorm while losing an argument.
One of the more satisfying moments in this hobby is bringing a tired tester back into service and comparing its behavior against known tubes. The meter settles down. The line mark lands where it should. Shorts testing behaves sensibly. Tubes that you know are weak finally read weak. That moment feels less like repair and more like translation. The machine is speaking clearly again.
There is also a practical pleasure in learning what each tester is good at. A fast emission tester is wonderful for sorting boxes of radio tubes when you just want to identify the obvious duds. A mutual-conductance unit earns its keep when you want deeper evaluation, better matching, or more confidence with audio and RF work. After a while, you stop asking which tester is “best” in some absolute sense and start asking which one is right for the job. That is when your bench gets smarter.
And yes, there is a certain comedy built into the whole experience. These machines were built to save time, yet they can inspire hours of debate over a neon lamp brightness, a resistor that drifted ten percent, or whether a certain 6L6 really looks stronger on one brand of tester than another. Vintage electronics people are very good at turning “quick tube check” into “weekend-long philosophical inquiry.” Honestly, that may be part of the charm.
In the end, using a restored tube tester feels like shaking hands across time with the service culture that built it. It is not just about the reading on the scale. It is about understanding how technicians once worked, how consumers once diagnosed their own radios, and how much ingenuity went into making a flexible diagnostic instrument from analog parts, moving contacts, and good electrical judgment. Once you have torn one down and brought it back properly, you never look at that humble meter the same way again.
Conclusion
A vintage tube tester teardown reveals far more than old parts under a lid. It shows a practical instrument built for a world where tubes were common, repairs were routine, and diagnosis had to be fast enough to matter. Whether the tester is a simple emission model or a more refined mutual-conductance machine, the story inside is one of smart compromises, service-minded design, and plenty of age-related surprises.
If you approach the teardown carefully, replace the truly failure-prone components, clean the mechanical path, and calibrate with respect for the original design, these instruments can still be genuinely useful today. Just do not ask them to be magical. Ask them to be honest. A vintage tube tester at its best does exactly that, and that is more than enough to make it one of the most satisfying pieces of old electronics you can restore.













