
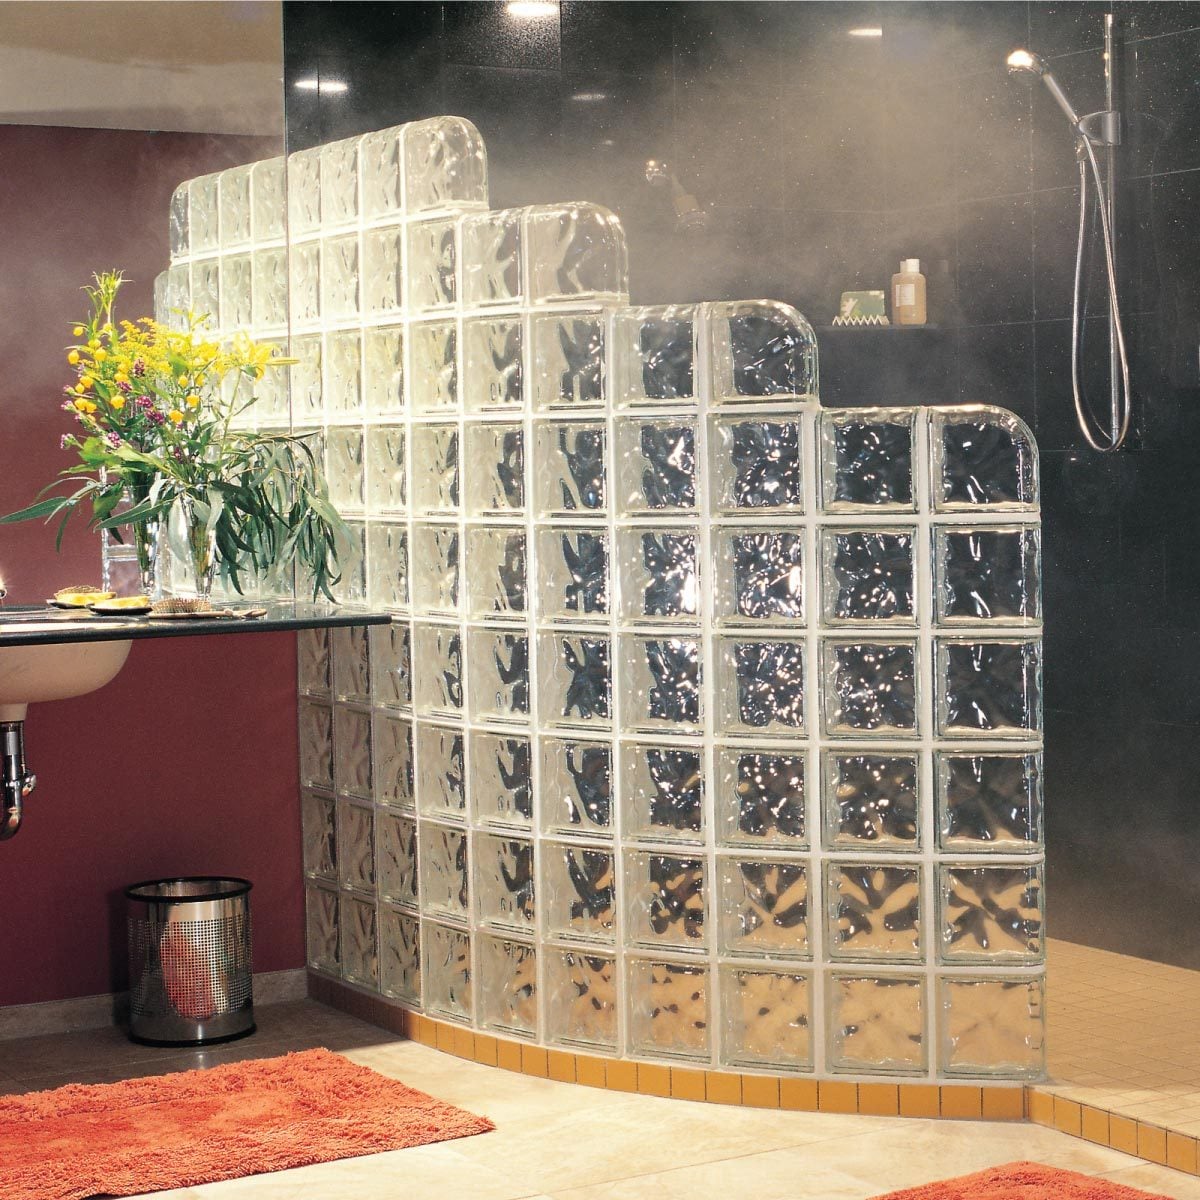
A glass block shower can make a bathroom feel brighter, more private, and a little more glamorouslike your shower has quietly been promoted to boutique-hotel status. Glass blocks diffuse light while creating a sturdy splash barrier, so they are a smart alternative to a standard clear-glass panel or shower curtain.
But installing a glass block shower is not simply a matter of stacking shiny squares and hoping for the best. The wall needs a stable base, a waterproof shower assembly, properly planned reinforcement, and materials designed specifically for glass block installation. Skip those details and your dreamy bathroom feature can turn into an expensive science experiment involving moisture, cracks, and regret.
This DIY guide explains how to install a small, straight glass block shower wall or partition using a traditional mortar system. It also covers planning, waterproofing, tools, common mistakes, and practical lessons that can save you from rebuilding the project after one overly enthusiastic shower.
Before You Build: Decide Whether a Glass Block Shower Is Right for Your Bathroom
Glass block works especially well for partial shower walls, walk-in shower partitions, and decorative shower screens. It gives you privacy without making a bathroom feel boxed in. Frosted, wavy, patterned, and clear glass block options can all work in a shower, although textured styles are usually the best choice for privacy.
A glass block shower wall is generally a non-load-bearing feature. It should not support framing, shelving, a shower door, or the ceiling. Think of it as a carefully built privacy wall, not as a tiny transparent brick fortress capable of holding up the house.
For a first DIY project, stick with a straight panel installed between a finished wall and a shower curb or tiled ledge. Curved walls, large freestanding panels, ceiling-height installations, and walls that need to support a door are more complicated and may require a professional installer or engineer.
Best Uses for a Glass Block Shower Wall
- A fixed walk-in shower screen.
- A partial privacy wall between the toilet and shower.
- A decorative end wall for a tub-to-shower conversion.
- A shower partition that allows daylight to reach the rest of the room.
- A compact shower enclosure where a solid wall would make the space feel dark.
When to Call a Professional
Bring in a contractor when the project requires moving plumbing, cutting floor joists, rebuilding a shower pan, creating a curbless shower, installing a structural opening, or adding a heavy hinged shower door near the glass block wall. A glass block partition can be DIY-friendly, but the waterproofing and structure around it are not places for creative improvisation.
Plan the Glass Block Shower Layout First
The planning stage is where you prevent the classic DIY surprise: discovering that your final row of blocks is three inches too tall, one inch too wide, and emotionally incompatible with the room.
Measure the finished opening after the shower curb, wallboard, waterproofing, tile, or finished ledge dimensions are known. Do not measure from unfinished studs and assume everything will work out later. Tile thickness, mortar, waterproofing layers, and trim can change the final opening more than many homeowners expect.
Choose your glass block size, then dry-fit the layout on the floor. Include the joint spacing, perimeter expansion material, spacers, and any edge or end blocks. Glass blocks are commonly sold in nominal sizes, but the actual dimensions vary by manufacturer and product line. Always use the installation chart or instructions supplied with your specific glass block system.
Choose the Right Type of Glass Block
For a shower, select blocks designed for wall applications rather than decorative craft projects. Most shower installations use hollow glass blocks in either 3-inch or 4-inch thicknesses. Thicker blocks generally create a more substantial wall, but they also take up more shower space and add weight.
Consider using finished end blocks or specialty edge units if one side of the wall will remain exposed. These blocks create a cleaner, more polished finish than leaving an ordinary block edge visible. They are the bathroom equivalent of putting a frame around a painting instead of hanging it with masking tape.
Plan Where Water Will Hit the Wall
Position the showerhead so the strongest spray does not blast directly into the outer perimeter joint of the glass block panel. The blocks themselves are highly moisture resistant, but the installation depends on durable joints, proper perimeter sealing, and a waterproof connection to the surrounding shower walls.
Also think about how someone will enter the shower. A glass block wall can create a beautiful walk-in opening, but you still need enough clearance to step in comfortably, dry off without elbowing the vanity, and avoid turning every shower into an obstacle course.
Tools and Materials for Installing a Glass Block Shower
Buy a complete system whenever possible. A glass block installation system may include spacers, panel anchors, reinforcing rods, perimeter expansion strips, channels, and compatible mortar or silicone. Mixing random components from different systems can create alignment problems or void product warranties.
Tools You Will Need
- Tape measure and pencil.
- 4-foot level and torpedo level.
- Speed square or framing square.
- Margin trowel and pointing trowel.
- Mixing bucket and drill with mixing paddle.
- Rubber mallet.
- Tile sponge and clean water buckets.
- Caulk gun.
- Safety glasses, gloves, and knee pads.
- Painter’s tape and drop cloths.
Materials You Will Need
- Glass blocks and any required end or corner blocks.
- Glass block mortar or a manufacturer-approved mortar-free installation kit.
- Glass block spacers.
- Panel anchors and reinforcing rods, where required.
- Perimeter expansion strips or channels.
- Waterproofing membrane compatible with your shower system.
- Cement backer board or approved waterproof shower wall panels.
- Corrosion-resistant fasteners.
- Polymer-modified thinset mortar for tile work.
- 100 percent mildew-resistant silicone sealant compatible with the installation system.
Step 1: Build a Stable, Waterproof Shower Base
The glass blocks are only as reliable as the shower base beneath them. Before installing a single block, make sure the curb, tiled ledge, or masonry base is solid, level, and fully integrated into the shower waterproofing system.
A shower floor should slope toward the drain, and the shower assembly should be waterproofed before the decorative finish materials go on. Cement board is water durable, but it is not automatically a complete waterproofing system by itself. In wet areas, use a properly installed sheet membrane or liquid waterproofing membrane according to the product manufacturer’s instructions.
Pay extra attention to the point where the glass block wall meets the shower curb or ledge. This is a transition area, and transition areas are where water likes to behave like a tiny criminal looking for an unlocked door.
Important Waterproofing Rule
Do not drill through a completed waterproof shower curb or pan unless your waterproofing system specifically allows it and provides a tested method for sealing the penetration. Fasteners placed carelessly through the curb can create a hidden leak path behind the tile.
Instead, plan the glass block wall before final waterproofing whenever possible. That allows you to install the proper substrate, blocking, anchors, and flashing details in the correct sequence. Follow the instructions for your chosen shower membrane and glass block system rather than inventing a hybrid assembly on the fly.
Step 2: Prepare the Wall Connection
A glass block shower wall usually connects to one solid finished wall. That wall needs adequate backing so the panel anchors can secure the glass block system without loosening over time.
Install framing or blocking behind the wall where anchors will be located. In many small residential glass block systems, anchors and horizontal reinforcement are installed at regular intervals for stability. The exact spacing depends on the manufacturer, the panel size, and the installation method, so use the requirements supplied with your system.
Make sure the wall surface is plumb. A glass block panel magnifies small alignment mistakes quickly. A slightly crooked stud wall can make your finished shower look like it was designed during an earthquake simulation.
Step 3: Dry-Fit the First Course
Before mixing mortar, place the first row of blocks on the curb or ledge with spacers in position. Check the overall length, wall connection, and opening width. Confirm that the blocks fit without forcing the final unit into place.
Use a level to inspect the base. If the curb is not level, correct the problem before starting. Trying to compensate with extra mortar under one side of the first row often creates a domino effect that gets worse with every course.
Mark the wall where anchors, expansion strips, or channels will go. Protect surrounding tile and fixtures with painter’s tape and drop cloths. Mortar haze is much easier to avoid than remove.
Step 4: Install Perimeter Expansion Material
Glass block panels need room for slight movement. Perimeter expansion strips, channels, or approved flexible materials help separate the glass block panel from rigid surrounding surfaces. This reduces stress on the blocks and joints as the building moves slightly with temperature and humidity changes.
Install the specified perimeter material along the wall connection and base as directed by the glass block manufacturer. Do not substitute random foam, weatherstripping, or leftover packing material. A shower wall deserves better than whatever was stuck to the side of your last appliance delivery.
Step 5: Mix the Glass Block Mortar
Use glass block mortar rather than ordinary tile thinset, drywall mud, or standard grout. Glass block mortar is formulated for the job and is designed to provide workability, strength, and a clean appearance around glass blocks.
Mix only as much material as you can use within the working time stated on the bag. Aim for a smooth, stiff consistency that holds its shape on a trowel. Mortar that is too wet can sag, stain the work area, and make the blocks drift out of alignment. Mortar that is too dry can be difficult to bond and tool properly.
Let the mixture slake if the manufacturer requires it, then remix without adding extra water unless the instructions allow it. Mortar chemistry is not a freestyle sport.
Step 6: Set the First Row of Glass Blocks
Spread an even bed of glass block mortar on the prepared base. Set the first block into the mortar, then add spacers according to the system layout. Continue across the first course, checking each block for level, plumb, and consistent joint spacing.
Use a rubber mallet gently if needed. Do not hammer the glass block like you are trying to win a carnival game. Small adjustments are fine; aggressive impacts can damage the block or disturb the mortar bed.
After completing the first course, check it again with a level. This row controls everything above it. A careful first course saves far more time than trying to correct a leaning wall halfway through the build.
Step 7: Add Reinforcement and Build Each Course
Apply mortar to the top of the first row and to the side of each new block as required by the system. Place each block with spacers, then check alignment before moving on. Work slowly and clean excess mortar from the glass as you go.
Add panel anchors and reinforcing rods where the manufacturer specifies. In many traditional mortar systems, reinforcement and wall anchors are used at regular intervals to strengthen the panel and secure it to the adjacent wall. These components are not optional decorative accessories; they help keep the wall stable and reduce cracking risk.
Check plumb after every course, not just when you remember to look up from the mortar bucket. A small lean can become obvious by the time you reach the top row.
Keep Joints Consistent
Glass block looks best when the mortar joints are uniform. Do not overfill some joints and starve others. Use the spacers provided with the system and keep the blocks clean enough that you can see the joint lines while you work.
If mortar squeezes onto the glass, remove it promptly with a damp sponge. Avoid flooding fresh joints with water. Gentle cleaning is the goal; turning the installation into a miniature slip-and-slide is not.
Step 8: Tool the Joints and Clean the Glass
When the mortar begins to firm up, tool the joints with a pointing tool or jointing tool to create a smooth, consistent finish. The timing matters. Tool too early and the mortar smears. Wait too long and it becomes stubborn enough to test your vocabulary.
Use a lightly damp sponge to clean mortar residue from the glass faces. Rinse the sponge frequently and wipe diagonally across joints rather than digging into fresh mortar. Follow the mortar manufacturer’s instructions for final cleaning and curing.
Step 9: Seal the Perimeter and Let the Wall Cure
Once the mortar has cured according to the manufacturer’s schedule, seal the perimeter transition between the glass block panel and adjacent shower finishes with a compatible flexible sealant. This is especially important where glass block meets tile, a wall, or a curb.
Use a shower-rated, mildew-resistant silicone sealant if your glass block and waterproofing system call for it. Keep the bead neat and continuous. A sloppy caulk line can make a beautiful glass block wall look like it was decorated by a tired raccoon.
Do not use the shower until the mortar, grout, sealant, and waterproofing-related products have cured fully. The wait can feel rude, especially when the new shower is sparkling at you from across the bathroom, but curing time is part of the installationnot an optional bonus level.
Mortar-Free Glass Block Shower Systems: Are They Easier?
Mortar-free glass block systems use proprietary channels, spacers, silicone, and grout components instead of traditional mortar joints. They can be cleaner and faster for some small projects, especially when using a manufacturer-designed kit.
However, mortar-free does not mean instruction-free. These systems require precise layout, compatible components, and careful sealing. Do not mix a mortar-free wall system with random glass block mortar, generic construction adhesive, or leftover tile grout. Use all components from the same approved system whenever possible.
A mortar-free kit can be a good choice for a small decorative shower partition, but a traditional mortar system may offer a more familiar approach for DIYers who are comfortable working with masonry materials.
Common Glass Block Shower Installation Mistakes to Avoid
Skipping Waterproofing Behind the Wall
Glass block is water resistant, but the shower assembly around it must still manage moisture. Waterproof the shower walls, curb, floor, and transitions before treating the glass block wall as a finished feature.
Using Tile Grout Instead of Glass Block Mortar
Tile grout is designed to fill narrow joints between tile, not to bond and support glass blocks. Use mortar or a manufacturer-approved glass block installation system.
Ignoring Expansion Space
A tightly trapped glass block panel can crack or stress the surrounding tile as materials move. Perimeter expansion strips and flexible sealant joints help the installation tolerate small movement.
Building Too Large a Panel Without Engineering
Large, tall, curved, or freestanding glass block walls have different reinforcement requirements. Keep a DIY project modest unless your manufacturer’s specifications clearly support the design.
Installing a Shower Door on the Glass Block Wall
Do not mount a hinged shower door directly to a glass block wall unless the system was specifically engineered for that use. A fixed panel, open entry, or door mounted to a framed wall is usually the safer approach.
How to Keep a Glass Block Shower Looking Great
Glass blocks are generally easy to clean because they do not have the many grout lines of a tiled shower wall. Use a nonabrasive bathroom cleaner and a soft cloth or sponge. Avoid harsh acids, metal scrubbers, and anything that could damage sealant or scratch nearby tile.
Inspect perimeter caulk once or twice a year. If it cracks, pulls away, or develops stubborn mildew that cannot be cleaned, remove the failed sealant and replace it. Also keep the bathroom ventilated with an exhaust fan. Good ventilation helps reduce humidity, slows mildew growth, and makes your bathroom less likely to smell like a forgotten gym locker.
Practical DIY Experience: What Homeowners Often Learn During a Glass Block Shower Project
Experienced DIY renovators often say the glass block wall itself is not the hardest part of the project. The difficult part is everything that happens before the first block is set. Measuring, waterproofing, leveling, and planning the wall connection usually take more patience than the actual stacking process. That can feel frustrating at first, but it is also the reason a finished wall looks intentional instead of accidental.
One of the most common lessons is that glass blocks make crooked surfaces very obvious. With painted drywall, a slightly uneven wall can hide in plain sight for years. Glass block is less forgiving. The repeating pattern creates clean horizontal and vertical lines, so even a small error in the first course can become noticeable several rows later. DIYers who take extra time with the base almost always report an easier installation afterward.
Another recurring lesson is that a dry layout is worth the effort. Laying out the blocks on the floor lets you catch problems before mortar is involved. You can see whether a finished edge block is needed, whether the shower opening feels too narrow, and whether the top course will end awkwardly. It is much easier to reorder one block or adjust a layout on the floor than it is to explain to yourself why a half-finished glass wall suddenly needs a redesign.
Many homeowners also underestimate how much cleanup matters. Mortar haze can make a fresh installation look cloudy and messy if it is allowed to dry on the glass. The smoothest projects usually involve frequent light cleaning rather than one dramatic cleaning session at the end. Keeping a clean sponge, fresh water, and a small towel nearby can make the work less stressful and protect the finished appearance.
There is also a practical rhythm to setting glass blocks. Rushing often causes blocks to drift, joints to vary, and mortar to smear across the faces. Moving steadily, checking level frequently, and stopping when the mortar begins to stiffen usually produces better results than trying to finish an oversized panel in one heroic burst of weekend confidence.
DIYers who are happiest with their glass block showers tend to choose a simple design. A straight wall, a manageable height, one secure wall connection, and a carefully waterproofed curb create a project that feels sophisticated without becoming unnecessarily complicated. The result can be bright, private, durable, and surprisingly timeless.
The biggest takeaway is simple: treat the glass block wall as part of the shower’s water-management system, not just as decoration. When the waterproofing, layout, reinforcement, and finishing details are handled properly, a glass block shower can become one of the most memorable features in the roomwithout becoming the reason you learn how to repair a ceiling below the bathroom.
Conclusion
Installing a glass block shower wall can be a rewarding DIY upgrade when you plan carefully and respect the technical details. Start with a waterproof shower base, measure the finished opening precisely, use a complete glass block system, reinforce the wall as required, and seal every transition properly. The work may take patience, but the payoff is a shower that feels brighter, more private, and far more custom than a standard curtain rod ever could.












