
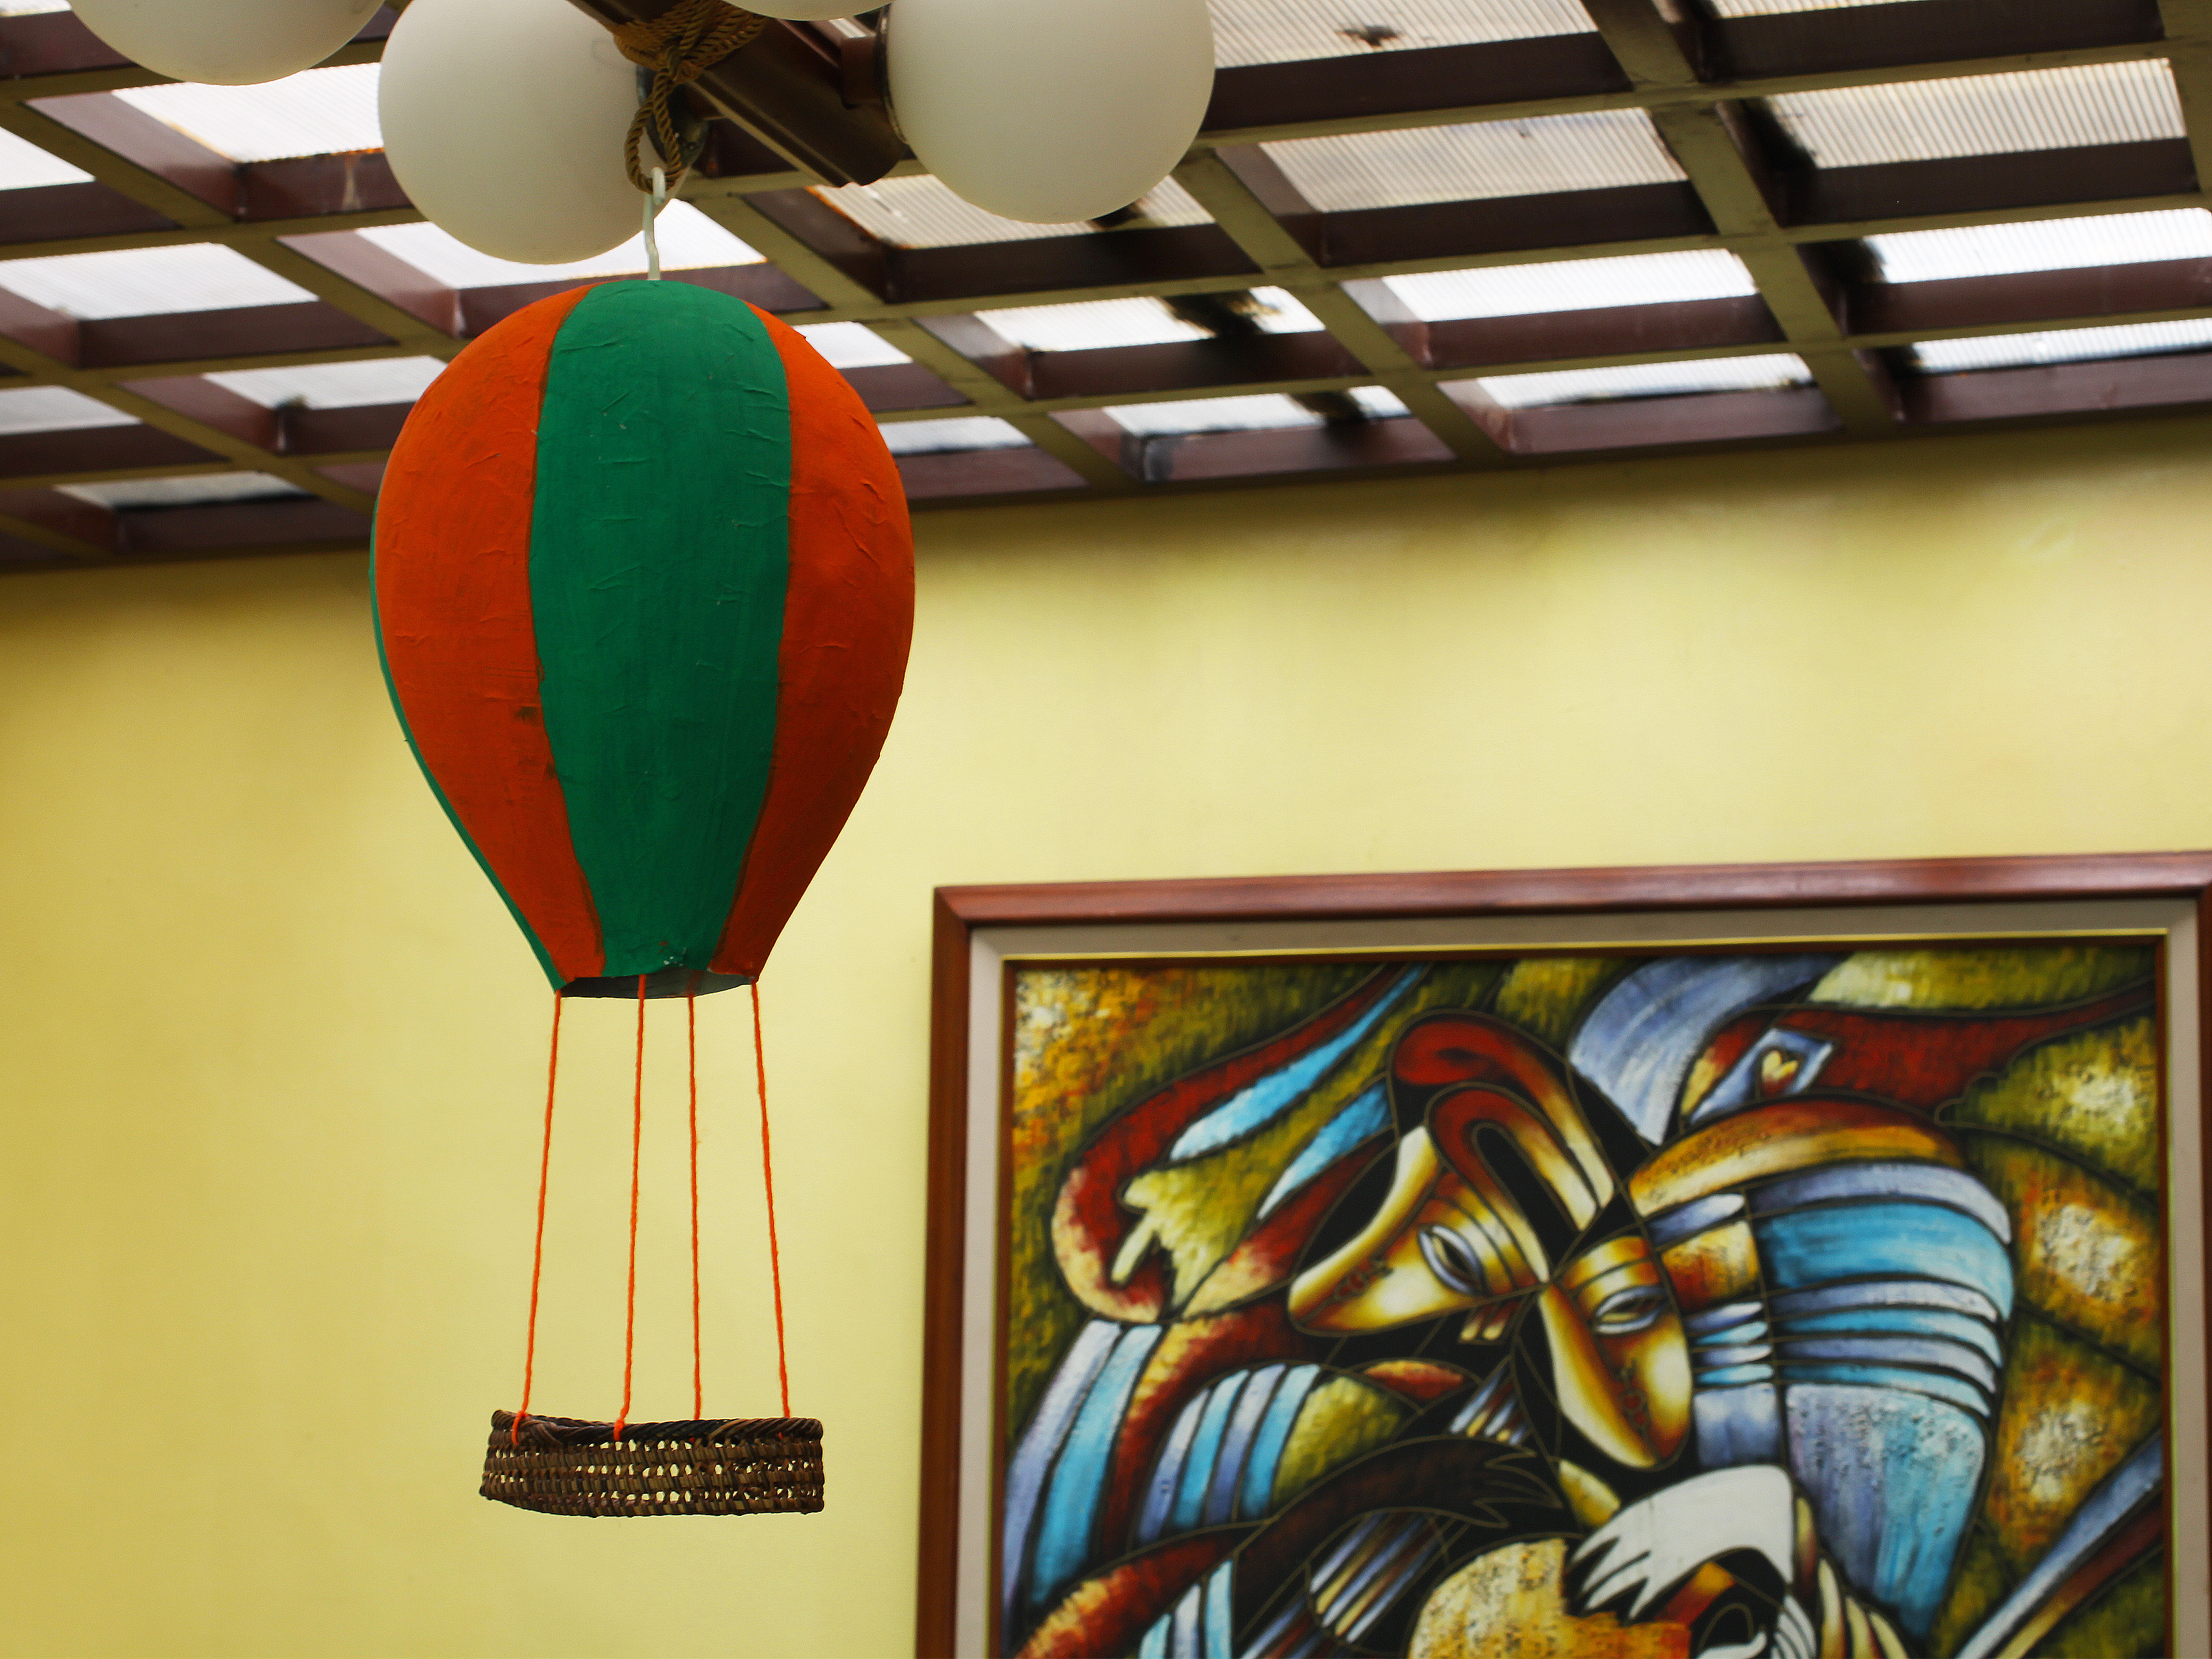
A decorative hot air balloon is one of those DIY projects that looks impressively fancy but is secretly made from humble supplies: a balloon, paper, glue, ribbon, paint, and a tiny basket that absolutely believes it is ready for international travel. Whether you are decorating a nursery, planning a baby shower, styling a classroom, creating a whimsical party centerpiece, or just trying to prove that your recycling bin has artistic potential, this handmade hot air balloon craft delivers charm without demanding a professional art studio.
The beauty of this project is flexibility. You can make a small hanging ornament, a colorful paper-mâché balloon, a rustic basket display, or a full party decoration. The basic structure stays the same: create a rounded balloon shape, strengthen it with layers of paper, decorate the surface, attach a basket, and hang or display it safely. It is part craft, part décor, and part “why did I not make three of these?”
This guide walks you through how to make a decorative hot air balloon in 8 clear steps. You will also find practical tips for choosing materials, avoiding common mistakes, decorating for different occasions, and giving the finished piece a polished look instead of the “my glue had a nervous breakdown” look. Let’s float into it.
Why Make a Decorative Hot Air Balloon?
Decorative hot air balloons are popular because they fit beautifully into several themes: travel, adventure, clouds, sky, nursery décor, vintage circus, storybook parties, “up, up and away” birthdays, and dreamy bedroom corners. They are lightweight, inexpensive, and easy to personalize. Unlike store-bought decorations, a handmade version can match your exact color palette, from soft pastels to bold rainbow stripes.
They also make excellent conversation pieces. Hang one near a window, above a dessert table, over a crib area as wall décor, or in a classroom reading corner. Just remember: this is a decorative craft, not a toy or a real flying object. It should be displayed out of reach of very young children, especially if you use small beads, ribbons, twine, or balloon pieces during construction.
Materials You Will Need
Before you start, gather your supplies. This project is easiest when everything is ready before your hands are covered in paste. Paper-mâché waits for no one, and neither does gravity.
Basic Supplies
- 1 round latex balloon or paper lantern form
- Newspaper, tissue paper, or lightweight craft paper
- White school glue or craft glue
- Water
- A bowl for mixing paste
- Paintbrush or sponge brush
- Acrylic craft paint or tempera paint
- Ribbon, string, twine, or thin cord
- Small paper cup, cardboard box, mini basket, or egg carton section
- Scissors
- Hole punch
- Hot glue gun or strong craft glue
- Clear sealer or decoupage finish, optional
- Fishing line or clear thread for hanging, optional
Helpful Extras
- Painter’s tape for clean painted sections
- Pom-pom trim, lace, tassels, or fringe
- Scrapbook paper for flags or bunting
- Wooden beads for decorative accents
- Mini faux flowers, clouds, stars, or paper passengers
- Sandpaper for smoothing dried paper-mâché
Step 1: Choose the Size and Style
Start by deciding what kind of decorative hot air balloon you want to make. A small ornament can be made with a water balloon, a medium decoration works well with a standard 9- to 12-inch balloon, and a large centerpiece may need a bigger balloon or a paper lantern base.
For a classic paper-mâché hot air balloon, inflate the balloon until it is slightly smaller than your desired finished size. Paper layers and paint will add a little bulk. Tie the balloon securely and place it knot-side down in a bowl to keep it steady while you work. If your balloon keeps rolling away like it has urgent appointments, tape the bowl to your table or use a mug as a holder.
If you want a faster version, use a paper lantern instead of paper-mâché. A lantern already has the rounded shape, so you can skip the drying time and move straight to decorating. However, paper-mâché gives a stronger, handmade, sculptural look and lets you paint bold designs more easily.
Step 2: Prepare the Paper-Mâché Paste
For a simple craft paste, mix equal parts white glue and water in a bowl. Stir until smooth. The texture should be runny enough to brush onto paper but not so watery that it slides off like soup on a waterslide. If it feels too thin, add more glue. If it feels too thick, add a little water.
Tear newspaper or thin paper into strips. Tearing works better than cutting because rough edges blend together more naturally. Aim for strips about 1 inch wide and 4 to 6 inches long. For curved surfaces, smaller strips are easier to control. Large strips tend to wrinkle, bunch, and generally behave like tiny paper blankets with attitude.
If you are making the project with kids, set up a protected workspace. Cover the table with newspaper or a washable cloth. Keep a damp rag nearby for sticky fingers. Use washable paint and non-toxic glue whenever children are involved.
Step 3: Cover the Balloon With Paper Layers
Brush paste onto a paper strip, place it on the balloon, and smooth it down with your fingers or brush. Continue overlapping strips until the balloon is covered. Leave a small uncovered area around the knot so you can remove the balloon later.
For a sturdy decorative hot air balloon, apply about three layers of paper. Let each layer dry before adding the next if you want the smoothest result. If you are short on patience, you can add multiple layers in one session, but drying will take longer. The shell should feel firm and dry before you pop the balloon inside.
Drying time depends on humidity, paper thickness, and how generous you were with the glue. Usually, overnight drying is best. Do not rush it with high heat. A fan can help, but a hair dryer or heater may warp the shape. Paper-mâché is dramatic enough without being roasted.
Step 4: Remove the Balloon and Smooth the Shell
Once the paper-mâché is completely dry, carefully make a small hole near the knot and let the balloon deflate slowly. Pull the balloon out through the opening. If the shell dents slightly, gently push it back into shape from the inside.
Trim the bottom opening with scissors so it looks neat. If the surface has bumps or sharp wrinkles, lightly sand it with fine sandpaper. You do not need perfection; handmade crafts should have personality. But smoothing obvious rough spots will help the paint look cleaner.
At this point, you have the balloon envelope: the large rounded top of your decorative hot air balloon. It may not look magical yet. It may look like a very ambitious paper egg. Do not panic. Paint is coming, and paint is basically craft makeup.
Step 5: Paint and Decorate the Balloon
Choose a color scheme before you paint. Classic hot air balloons often have vertical panels, stripes, or scalloped sections. To create even panels, lightly mark the balloon into sections with pencil or use narrow painter’s tape as a guide. Eight vertical sections create a balanced, traditional look.
Paint every other section in contrasting colors, or use a soft ombré effect. For nursery décor, try cream, blush, powder blue, sage green, or pale yellow. For a birthday party, go with primary colors, rainbow panels, or metallic accents. For vintage style, use muted red, navy, tan, and gold.
Let the first coat dry, then add a second coat if needed. Acrylic paint gives strong color and good coverage. Tempera paint works well for kids’ crafts and creates a matte finish, though it may need sealing if you want the decoration to last.
After painting, add details: thin ribbon along panel lines, paper bunting around the middle, gold dots, tiny stars, clouds, or painted windows. A clear decoupage finish or light sealer can protect the surface and give it a more finished look.
Step 6: Make the Basket
The basket can be as simple or detailed as you like. A small paper cup works beautifully: cut it down to about 2 to 3 inches tall, paint it brown or tan, and add lines to imitate woven wicker. You can also use a mini cardboard box, a small berry basket, an egg carton cup, or a handmade paper basket.
For a realistic basket effect, wrap twine around the outside and secure it with craft glue. Add a strip of ribbon or pom-pom trim along the top edge. If you are making a party centerpiece, fill the basket with tissue paper, faux flowers, candy, or tiny themed decorations.
Use a hole punch to make four evenly spaced holes near the top rim of the basket. These holes will hold the strings that connect the basket to the balloon. Try to space them evenly so the basket hangs straight. A crooked basket is not the end of the world, but it may look like your imaginary passengers are experiencing turbulence.
Step 7: Attach the Basket to the Balloon
Cut four equal lengths of ribbon, string, or twine. Tie one end of each piece to the basket holes. Then attach the other ends to the lower part of the balloon envelope. You can glue them inside the lower opening, punch small holes in the paper-mâché shell, or use small pieces of tape reinforced with glue.
Before everything dries permanently, hold the balloon up and check the balance. Adjust the string lengths until the basket hangs level. This step matters because uneven strings make the whole decoration look less polished.
If you want extra detail, add decorative “ropes” from the top of the balloon down to the basket. Thin ribbon can create a charming vintage effect. For a soft nursery look, choose cotton cord or satin ribbon. For rustic party décor, jute twine looks wonderful.
Step 8: Hang or Display Your Decorative Hot Air Balloon
To hang the balloon, poke a tiny hole at the top of the paper-mâché shell and thread fishing line or clear thread through it. Tie the line to a small bead, toothpick, washer, or short dowel placed inside the shell so the thread does not pull through. Then hang it from a ceiling hook, curtain rod, mobile frame, or party backdrop.
If you prefer a tabletop display, place the basket on a small stand or use wooden skewers hidden inside decorative straws to support the balloon. This approach works well for centerpieces because guests can admire the craft without looking up and wondering if it is about to launch a dessert-table invasion.
Keep the finished decoration away from open flames, high heat, damp areas, and rough handling. If you plan to use it outdoors, keep it under cover and apply a protective sealer. Paper-mâché and rain have a tragic relationship.
Creative Design Ideas
Nursery Hot Air Balloon
Use soft pastel colors, lightweight ribbon, and a tiny basket filled with faux clouds or felt stars. Hang several balloons at different heights for a dreamy mobile-inspired display. Make sure decorations are securely installed and kept well out of reach of babies and toddlers.
Baby Shower Centerpiece
Create a larger balloon using a paper lantern or oversized paper-mâché shell. Use the basket as a holder for flowers, small favors, or rolled baby socks. Add a banner with phrases like “Up, Up and Away” or “Adventure Begins.”
Classroom Decoration
Decorative hot air balloons are perfect for reading corners, geography units, travel themes, and bulletin boards. Students can write goals or book recommendations on paper clouds and hang them below the balloons.
Vintage Adventure Theme
Paint the balloon in cream, burgundy, navy, or mustard yellow. Add faux leather ribbon, twine, tiny map cutouts, or miniature luggage tags. This style works especially well for office shelves or travel-themed parties.
Common Mistakes to Avoid
One common mistake is using too much paste. The paper should be wet enough to stick, not drenched. Excess paste creates long drying times and may cause wrinkles. Another mistake is popping the balloon too early. If the paper-mâché is damp inside, the shell may collapse like a disappointed soufflé.
Also avoid attaching a heavy basket to a lightweight balloon shell. Keep the basket proportional and light. If your basket is too heavy, the balloon will hang awkwardly or tear. Use lightweight materials such as paper cups, cardboard, egg cartons, or thin craft wood.
Finally, do not skip balance testing. Always hold the finished piece up before glue fully sets. Adjusting strings while the glue is wet is easy. Adjusting them after everything dries is when crafting becomes a tiny legal dispute between you and physics.
Safety Tips for Crafting and Display
Because this project may involve latex balloons, small decorations, scissors, glue, and hanging strings, adult supervision is important when children help. Keep uninflated balloons and broken balloon pieces away from young children. Dispose of balloon scraps immediately after removing the inner balloon from the paper-mâché shell.
If using a hot glue gun, an adult should handle it or closely supervise older children. Hot glue can burn skin quickly. For younger kids, use white craft glue, glue dots, or tacky glue instead. The project may take longer to dry, but everyone keeps their fingerprints un-toasted.
For hanging décor, secure it carefully. Do not hang heavy items above cribs, beds, or seating areas. Use lightweight materials and check hooks, knots, and strings before displaying.
Budget-Friendly Tips
You do not need expensive supplies to make a decorative hot air balloon. Recycled newspaper, old gift wrap, paper cups, cardboard packaging, and leftover ribbon can all become part of the project. Dollar stores and craft stores are good places to find paint, brushes, glue, paper, twine, and small baskets.
If you are making several balloons for a party, create an assembly line. Cover all balloons with paper-mâché first, let them dry together, then paint them in batches. Use one shared color palette so the decorations look coordinated even if every balloon has a slightly different pattern.
Experience Notes: What I Learned Making Decorative Hot Air Balloons
The first time you make a decorative hot air balloon, you will probably learn one important lesson: paper-mâché looks suspicious before it looks beautiful. During the early stages, the project may resemble a lumpy moon, a papier-mâché potato, or an art-class science experiment. Keep going. Once the surface dries, gets trimmed, and receives paint, the transformation is surprisingly satisfying.
One practical experience is that smaller paper strips work better than large pieces. Large strips seem faster, but they wrinkle around the curve of the balloon. Smaller strips hug the round surface and create a smoother finish. It takes a little more time, but the final result looks cleaner, especially if you plan to paint vertical stripes or detailed panels.
Another lesson: balance matters more than you think. The balloon envelope is large and light, while the basket is small but can become heavy once decorated. If you add flowers, candy, beads, or wooden embellishments, test the weight before attaching everything permanently. A basket that is too heavy will pull the balloon downward and make it hang oddly. Lightweight filler, tissue paper, or paper flowers are better than dense objects.
Paint choice also changes the final mood. Bright acrylic paint creates a cheerful party look, while chalky or muted paint gives a vintage handmade style. Metallic paint can look wonderful, but use it sparingly. A little gold trim says “charming adventure.” Too much gold says “tiny luxury aircraft owned by a squirrel.”
Drying time is the part people underestimate. Paper-mâché may feel dry on the outside but remain damp underneath. If you remove the balloon too early, the shell can soften or collapse. Letting it dry overnight is usually worth it. If your home is humid, give it even more time. Place it near a fan, not a heater, to encourage gentle drying without warping.
For party decorations, making multiple balloons in different sizes creates the best visual impact. Hang them in clusters at staggered heights instead of lining them up evenly. Odd numbers usually look more natural: three above a dessert table, five in a classroom corner, or seven in a large event space. Add paper clouds between them to create a floating sky effect.
For nursery décor, keep the design soft and simple. Avoid heavy hanging pieces, loose beads, or long dangling cords near children. A decorative hot air balloon can look beautiful on a high shelf, mounted to a wall, or hung securely as part of a ceiling display far from little hands. Safety is not the boring cousin of creativity; it is the reason your beautiful craft stays beautiful instead of becoming a household incident report.
One of the nicest things about this project is how personal it becomes. You can paint names, dates, tiny stars, favorite colors, or travel-inspired details onto the balloon. A handmade hot air balloon for a baby shower can become nursery décor later. A classroom version can hold student wishes. A party centerpiece can double as a keepsake. That is the magic of DIY décor: it is not just cheaper than buying something finished; it carries the maker’s fingerprints, decisions, tiny mistakes, and little victories.
And yes, mistakes happen. A stripe may wobble. A ribbon may sit slightly crooked. The basket may lean until you adjust it three times and question your relationship with string. But those tiny imperfections often make the final piece more charming. Decorative hot air balloons are supposed to feel whimsical, not factory-stamped. If it looks playful, colorful, and ready to float into a storybook sky, you did it right.
Conclusion
Learning how to make a decorative hot air balloon is easier than it looks, and the result is a lightweight, customizable craft that works for nurseries, parties, classrooms, gifts, and whimsical home décor. With a simple paper-mâché balloon, a painted design, a handmade basket, and a few strings or ribbons, you can create a charming piece that feels both handmade and polished.
The key is patience: let the paper-mâché dry fully, keep the basket light, balance the strings carefully, and choose colors that match your theme. Once you understand the basic 8 steps, you can make endless variationsfrom pastel baby shower balloons to vintage travel decorations and bright birthday centerpieces. It is affordable, creative, and just messy enough to feel like a proper craft adventure.
Note: This article is written for decorative crafting purposes only. Finished hot air balloon crafts should be displayed securely and kept away from open flames, moisture, and very young children.













