
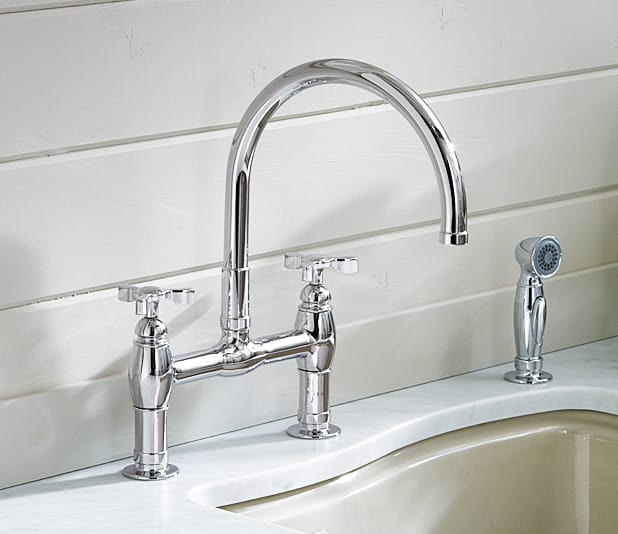
A dripping faucet has a special talent: it can sound louder at 2 a.m. than a marching band practicing in your bathroom. Beyond the irritation, that innocent-looking drip wastes water S. Environmental Protection Agency, a faucet dripping once per second can waste more than 3,000 gallons of water in a year. tely, learning how to fix a leaky faucet is usually easier than learning to ignore one. Most repairs involve shutting off the water, removing the handle, identifying the faucet mechanism, and replacing an inexpensive washer, O-ring, cartridge, valve seat, or set of springs.
This guide explains how to diagnose the leak, choose the correct replacement parts, complete the repair safely, and avoid the little mistakes that turn a 30-minute project into an unscheduled kitchen renovation.
Why Is Your Faucet Leaking?
A faucet controls water by pressing internal seals against openings in the valve body. Every time you turn the handle, those parts move, rub, compress, and relax. After thousands of uses, rubber seals harden, washers flatten, springs weaken, cartridges crack, and mineral deposits interfere with a tight seal.
The location of the water provides the first clue:
- Dripping from the spout: The cartridge, stem washer, valve seat, ceramic disk, or seats and springs may be worn.
- Leaking around the handle: A damaged O-ring, packing seal, cartridge, or loose retaining nut may be responsible.
- Leaking around the spout base: The spout seals or O-rings are common suspects.
- Water under the sink: Check the supply lines, shutoff valves, faucet connections, pull-down hose, and drain assembly.
- Poor or uneven flow: The aerator may be clogged with sediment rather than the faucet actually leaking.
Manufacturers commonly recommend replacing the valve or cartridge when water continues dripping from the spout while the faucet is turned off. Base leaks, by contrast, frequently point to worn seals or O-rings. fy Your Faucet Type Before Taking It Apart
Faucets may look similar on the outside while hiding very different mechanisms inside. Correct identification prevents you from buying a random “universal” cartridge that turns out to be universal everywhere except your house.
Compression Faucet
A compression faucet usually has separate hot and cold handles that must be turned several rotations. Each handle raises or lowers a threaded stem. A rubber washer at the end of that stem presses against a valve seat to stop the water.
A worn stem washer is the classic cause of a compression-faucet drip. A rough or corroded valve seat can also damage a new washer and restart the leak.
Cartridge Faucet
Cartridge faucets may have one or two handles. The handle usually moves smoothly without requiring several full turns. Inside, a replaceable cartridge controls water volume and temperature.
Cartridges vary by brand and model. Bring the old cartridge to the hardware store, photograph the faucet, locate its model number, or use the manufacturer’s product-identification resources before purchasing a replacement. American Standard notes that faucet models may require specific cartridges and that an incorrect part can cause poor performance or continued leaking. aucet
Commonly found in older single-handle kitchen faucets, a ball faucet uses a rotating metal or plastic ball, rubber seats, and small springs. Because the mechanism contains several wear parts, a complete repair kit is often the simplest solution.
Ceramic-Disk Faucet
A ceramic-disk faucet uses two precisely fitted ceramic disks inside a cylinder. These faucets are durable, but seals can deteriorate and sediment can interfere with the disks. A damaged disk cylinder generally needs to be replaced rather than improvised with unrelated parts.
Tools and Materials You May Need
Gathering supplies before shutting off the water reduces the chance of standing in the kitchen with half a faucet in your hand and no usable sink.
- Flat-head and Phillips screwdrivers
- Allen wrench set
- Adjustable wrench
- Tongue-and-groove pliers
- Needle-nose pliers
- Utility knife or small pick
- Clean rags and an old towel
- Small bucket or bowl
- White vinegar and an old toothbrush
- Plumber’s silicone grease
- Replacement cartridge, washers, O-rings, seals, or repair kit
- Valve-seat wrench for certain compression faucets
Use silicone-based plumber’s grease on potable-water faucet seals when lubrication is recommended. Petroleum jelly can degrade certain rubber components and should not be treated as an automatic substitute.
How To Fix a Leaky Faucet: Easy Step-by-Step Instructions
Step 1: Determine Exactly Where the Water Is Coming From
Dry the faucet, sink deck, supply lines, and cabinet floor. Then observe the fixture with the faucet both off and running.
If the spout drips while the handles are off, the problem is probably inside the valve assembly. If water appears only while the faucet is running, inspect the handle seals, spout base, spray hose, and supply connections. Place dry paper towels around suspicious areas; even a slow leak will leave a visible mark.
Step 2: Turn Off the Water Supply
Find the hot- and cold-water shutoff valves beneath the sink. Turn each valve clockwise until it stops. Do not force a valve that is badly corroded or frozen.
Open the faucet to confirm that the water has stopped and to release pressure trapped in the lines. A brief trickle is normal. Continuous flow means a shutoff valve is not fully closed or is defective. In that situation, close the home’s main water valve before proceeding.
Step 3: Protect the Sink and Drain
Place a towel in the basin and cover the drain with a stopper or rag. This simple step protects the finish and prevents a tiny screw from disappearing into the plumbing dimension where all missing faucet parts apparently go.
Arrange removed components in order on another towel. Taking a photo after each stage gives you a visual map for reassembly.
Step 4: Remove the Faucet Handle
Look for a decorative cap marked with a hot or cold symbol. Gently pry it off with a small flat-head screwdriver. Other faucets have a set screw hidden beneath or behind the handle, often requiring an Allen wrench.
Remove the screw and lift the handle straight up. If mineral buildup has glued it in place, wiggle it gently. A faucet-handle puller can remove stubborn handles without excessive prying. Avoid squeezing decorative surfaces directly with pliers because the finish can scratch or deform.
Step 5: Remove the Retaining Hardware
Depending on the faucet, you may encounter a decorative bonnet, retaining clip, packing nut, mounting nut, or threaded cap. Note its position before removal.
Use an adjustable wrench carefully, placing a cloth between the tool and any visible finished surface. Hold the faucet body steady when loosening stubborn hardware so you do not twist the supply lines underneath.
Step 6: Remove the Cartridge, Stem, Ball, or Disk Cylinder
Pull the internal assembly straight out whenever possible. Some cartridges are secured by a clip, while others require a specialized cartridge-pulling tool. Notice which direction the cartridge faces; tabs, grooves, hot-side markings, and alignment pins may determine how the replacement must be installed.
If the part refuses to move, stop before using heroic amounts of force. Recheck for hidden clips or threaded retainers and consult the manufacturer’s instructions for that model.
Step 7: Inspect and Clean the Valve Body
Examine the removed components under bright light. Look for:
- Flattened, brittle, cracked, or swollen O-rings
- Grooved or hardened rubber washers
- Weak or corroded springs
- Cracks in the cartridge body
- White or green mineral deposits
- Pitting or roughness on a valve seat
- Debris inside the faucet housing
Wipe the valve body with a soft cloth. Remove loose mineral deposits without gouging the metal. Delta’s repair guidance recommends cleaning the openings before installing new seats and springs so debris does not prevent the replacement parts from sealing properly. : Replace the Faulty Parts
The exact repair now depends on your faucet type.
Repairing a Compression Faucet
- Unscrew and remove the valve stem.
- Remove the screw holding the rubber washer at the bottom.
- Install a washer with the same diameter and thickness.
- Inspect the O-ring around the stem and replace it if cracked or flattened.
- Check the valve seat inside the faucet body for grooves or corrosion.
- Replace a removable damaged seat with the correct seat wrench, taking care not to overtighten it.
A washer that is merely “close enough” may not seal. Match the old part precisely or use the faucet’s model information.
Repairing a Cartridge Faucet
- Remove the cartridge retaining nut or clip.
- Pull the cartridge straight out.
- Compare the old and new cartridges carefully.
- Apply a thin film of silicone plumber’s grease to approved seals if directed by the manufacturer.
- Insert the cartridge in the same orientation as the original.
- Reinstall the clip or retaining nut.
Do not rotate a cartridge randomly to make it fit. Incorrect orientation can reverse hot and cold operation, restrict movement, or allow the faucet to keep leaking.
Repairing a Ball Faucet
- Remove the handle, cap, cam, packing, and ball.
- Lift out the rubber seats and metal springs with a pick or small Allen wrench.
- Clean the seat openings with a soft cloth.
- Install the new springs and rubber seats in the direction shown by the repair-kit instructions.
- Reinstall the ball, aligning its slot or pin correctly.
- Replace the cam, packing, cap, and handle.
Because ball faucets contain multiple small parts that wear together, replacing all components in a model-compatible kit is often more reliable than changing only one seal. ing a Ceramic-Disk Faucet
- Remove the handle and decorative cap.
- Unscrew and lift out the disk cylinder.
- Inspect the inlet seals underneath the cylinder.
- Clean accessible sediment gently.
- Replace damaged seals or install the correct cylinder assembly.
- Reassemble without overtightening the screws.
Ceramic parts are hard but can still crack when handled roughly. Tighten components evenly and stop when they are secure.
Step 9: Reassemble the Faucet
Reverse the disassembly sequence, using your photos as a guide. Reinstall retaining clips fully, align cartridges correctly, and tighten nuts only enough to create a secure seal.
Overtightening can crush washers, distort seals, damage threads, or make the handle difficult to operate. “Tighter” is not always a plumbing superpower.
Step 10: Restore the Water Slowly
Leave the faucet handle in the open position. Gradually open the shutoff valves beneath the sink. This lets trapped air escape and reduces the sudden pressure applied to the repaired parts.
Allow water to run for 30 to 60 seconds, then close the faucet and inspect the spout, handle, base, supply connections, and cabinet below. Use a dry paper towel to detect small leaks.
Step 11: Clean the Aerator
Repair work can loosen sediment that later becomes trapped in the aerator. Unscrew the aerator from the spout, keeping track of the screen and washer arrangement.
Rinse loose debris away. For mineral buildup, soak the components in equal parts warm water and white vinegar, scrub gently with an old toothbrush, rinse, and reinstall. Kohler recommends this type of vinegar treatment as a temporary solution for hard-water buildup in an aerator. f the Faucet Still Leaks?
A continued drip does not automatically mean the project has failed spectacularly. Work through these common causes:
- Incorrect replacement part: Similar-looking cartridges may have different ports, dimensions, or rotation limits.
- Cartridge installed backward: Check alignment tabs and hot-side markings.
- Retaining clip not fully seated: The cartridge may lift slightly under pressure.
- Debris trapped beneath a seal: Shut off the water, reopen the faucet, and clean the valve body.
- Damaged valve seat: A rough seat can quickly damage a new washer.
- Cracked faucet body: Internal cracks generally require complete faucet replacement.
- Excessive water pressure: High household pressure can shorten the life of cartridges and seals.
If a new cartridge does not stop the leak, verify that the part is correct and properly installed before replacing more components. Manufacturer support can identify parts using the model number or photographs. hould You Call a Plumber?
Most sink-faucet repairs are reasonable beginner projects, but professional assistance is the safer choice when:
- The local shutoff valves do not close or begin leaking when moved.
- The faucet body, supply pipe, or valve housing is cracked.
- Connections are severely corroded.
- Water appears behind a wall or inside a cabinet structure.
- The cartridge is seized and cannot be removed safely.
- The leak returns repeatedly despite correct replacement parts.
- You discover mold, damaged flooring, or swollen cabinetry.
- The main water valve is inaccessible or unreliable.
Leaks involving hidden pipes, extensive corrosion, or damaged faucet bodies may require professional inspection rather than another round of washers and optimistic wrenching. Prevent Future Faucet Leaks
Turn handles firmly enough to stop the flow, but do not crank them down. Excess pressure compresses washers and seals unnecessarily. Clean the aerator periodically, address mineral buildup, inspect supply lines, and repair minor seepage before it damages the cabinet.
Keep the faucet’s model number, installation manual, and replacement-part information in a household maintenance file. Future you will be delighted not to identify a ten-year-old faucet from blurry internet pictures.
If the faucet is badly corroded, replacement parts are unavailable, or repairs are becoming frequent, installing a new fixture may be more practical. EPA WaterSense-labeled faucets are independently certified to use at least 20 percent less water than standard models while meeting performance requirements. orld Experiences From Fixing Leaky Faucets
The first lesson many homeowners learn is that the actual repair is often easier than identifying the replacement part. A cartridge may come out in five minutes, only to begin a 45-minute hardware-store scavenger hunt. Taking the old part with you is enormously helpful. Put it in a sealed plastic bag so residual water and grease do not decorate your car upholstery.
Another useful habit is photographing every layer during disassembly. Faucet components frequently look obvious while they are installed and mysteriously abstract ten minutes later. A quick photo captures the direction of clips, tabs, springs, washers, and handles. It also prevents the classic discovery of one “extra” part after the faucet has been reassembled.
Covering the drain deserves more respect than it gets. Small set screws have an almost supernatural ability to bounce once, change direction in midair, and dive directly into an uncovered drain. A folded towel protects the sink, traps dropped hardware, and creates a clean work surface.
Stuck parts are another common source of trouble. Mineral deposits can make a handle or cartridge feel permanently welded in place. The instinctive response is to grab larger pliers and apply more force. That approach can turn a replaceable cartridge into a broken cartridge trapped inside the valve body. Rechecking for hidden retaining clips and using the correct puller is slower for five minutes and much faster for the rest of the afternoon.
One of the most frustrating experiences is completing the repair, restoring the water, and hearing another drip. Often, the new component is not defective. The cartridge may be slightly misaligned, a retaining clip may not be completely seated, or a grain of mineral debris may be trapped beneath a seal. Turning the water off again and calmly checking the assembly usually works better than tightening everything until the faucet fears for its life.
Older shutoff valves can also change the scope of the project. A valve that has not moved for years may refuse to close or may begin seeping around its stem after being turned. Test the valves before dismantling the faucet. Knowing where the main shutoff is located provides an essential backup plan and considerably lowers the household drama level.
It is equally important to distinguish a faucet leak from nearby plumbing problems. Water found under a kitchen sink might come from a loose supply-line connection, pull-down hose, sprayer fitting, drain basket, garbage-disposal flange, or dishwasher hose. Drying everything and testing one component at a time prevents replacing a perfectly healthy cartridge while the real leak continues nearby, quietly enjoying the confusion.
Finally, avoid treating every old faucet as a priceless heirloom. A well-made fixture may be worth repairing several times, especially when genuine parts remain available. However, a cracked, heavily corroded, or poorly supported faucet can consume more money and patience than a replacement. The best DIY decision is not always repairing the existing part; sometimes it is recognizing when the fixture has completed its long and drippy career.
Conclusion
Fixing a leaky faucet begins with careful diagnosis rather than immediate disassembly. Identify where the water appears, determine the faucet type, shut off the supply, protect the drain, and document the order of every component you remove. Replace worn parts with exact model-compatible components, clean away debris, and restore the water gradually.
For many homeowners, the repair requires only basic tools, an inexpensive part, and a little patience. The reward is immediate: a quieter room, a drier cabinet, lower water waste, and the deeply satisfying knowledge that you have defeated the drip.
Note: Faucet construction and replacement procedures vary by manufacturer and model. Always follow the fixture manufacturer’s instructions when they differ from general repair guidance, and contact a licensed plumber when shutoff valves, hidden pipes, severe corrosion, or structural water damage are involved.












